Experimenting with Colpitts Oscillators
Most of the RF circuits we have discussed to date are based on crystal oscillators. Â Crystals provide excellent stability in an oscillator circuit, but are limited to a single operating frequency (or a limited frequency set). Â Luckily, crystal oscillators aren't the only game in town. Â In fact, many types of oscillator circuits exist, including a popular variation; the Colpitts Oscillator, named after its inventor Edwin H. Colpitts.
The Colpitts oscillator is an LC oscillator, meaning that it generates its resonant frequency through an inductor (L) and capacitor (C) tank circuit.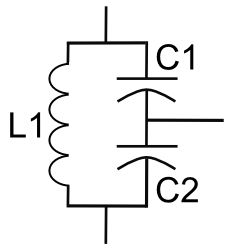 Â
Â
The tank circuit oscillates as voltage charges C1 and C2 and is discharged through L1, driven by a single transistor. Â I found this YouTube video, which shows an animation of current as it moves through the circuit, which may be helpful to visualize how the circuit works.
Many variations of the colpitts oscillator exist, but all have this LC tank circuit in common. Â The beauty of this design is that is can be scaled for any frequency, by changing the L and C values.
I experimented with several variations to present a simple but practical design for the 40 meters radio band. Â The two most important factors that were considered were: 1) frequency stability, 2) a clean sinusoidal waveform. Â This design generally meets these two requirements.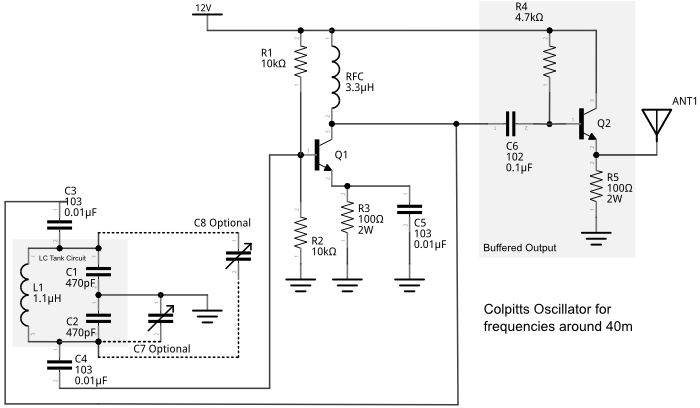
The optional variable capacitors C7 and C8 are used to fine tune the output frequency. Â C7 will give you tighter control over the frequency, while C8 will give you a wider tuning range. Â The RFC or RF choke is an inductor that connects voltage to the circuit but isolates the DC voltage from the oscillator circuit. Â For the RFC I used 26 turns on a T50-2 toroid. Â For L1 I used 17 turns on a T50-6 toroid. Â Q1 is an 2n3053 (preferably heatsinked). Â Q2 is a 2n3904.
This particular design includes a buffered output. Â This is important to the overall stability of the circuit. Â Since the colpitts is a Voltage Controlled Oscillator (VCO), anything inside the circuit that would alter the voltage will also affect the frequency generated. Â The output buffer allows you to add additional stages to the circuit without affecting the oscillator stage.
Likewise, the circuit is using +12v DC. Â Other input voltages can be used, and so can other transistors, but both will affect the frequency output.
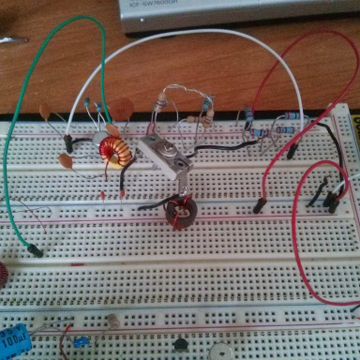
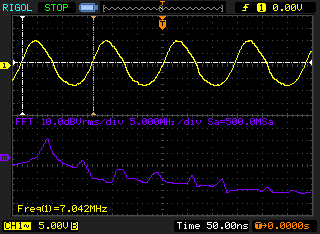
Here is the circuit on a breadboard, and its waveform:
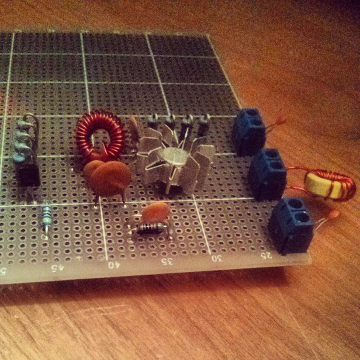
And this is what it looks like after I soldered it up:
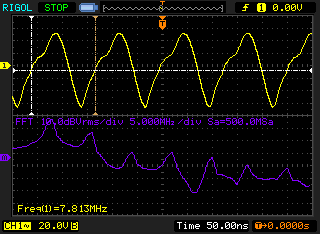
In general, it's a terrible idea to construct RF circuits on a breadboard. Â As you can see, my output waveform is cleaner on the breadboard as opposed to the circuit, because I modeled the circuit on the breadboard. Â RF circuits do not perform well on breadboards (although HF circuits do OK), because of the parasitic capacitance created by the conductor rows. Â But, if you are just having fun like me, a breadboard is a simple way to prototype and the results aren't too far off, and a low pass filter will clean up the waveform.
Also, you will see that the frequency output differs between the breadboard and the soldered version. Â Again, this is due to the extra capacitance added by the breadboard. Â But, this is simple to overcome; add additional capacitance to C1 and C2 or increase windings on L1 to lower the frequency (or decrease windings to increase the frequency).
Try it out yourself and see what values work. Â Change the input voltage and transistors to suit your needs or available parts.
Additional reading:
>Â http://www.learnabout-electronics.org/Oscillators/osc23.php
>Â http://www.electronics-tutorials.ws/oscillator/colpitts.html
Posted: Apr 04, 2014
Keyword tags: colpitts oscillatorelectronicsschematic


