

New Rig in the Shack: the Elecraft KX3
I haven't done much circuit experimentation recently, and for a good reason;  I am the proud owner of an Elecraft KX3 tranceiver, which I picked up partially as a reward for my recent Extra Class ham radio license upgrade and partially to expand my radio operating abilities.  I've been spending a lot of the time I dedicate to radio experimentation, learning and using my new purchase.
The KX3 has been on my radar ever since it was announced in 2011.  In fact, I've been a lurker on the KX3 Yahoo! group since June 2011.  Since I already owned a perfectly good portable QRP tranceiver, the Yaesu FT-817ND, and because I'm a regular person who doesn't have unlimited funds for buying radio gear, I controlled myself from purchasing this truly awesome radio for a long while.
I'm a big fan of Elecraft; the philosophy of the company focuses on building, and many, if not all, of their products are available in kit form. Â Many of their kits require soldering, while some of the newer kits (including the KX3) are no solder kits, and are more akin to building a computer. Â As you may have guessed, I love building my own gear. Â I feel you learn more about how things work by and gain more satisfaction by getting your hands dirty.
Operating the KX3
Much has been written about this radio, and I don't want to parrot everyone else, so I'll focus on a few areas that were purchase considerations for me.
The DSP filters work very well, and you can control the bandwidth, shape, and position of your filters in a number of variable configurations to optimize receive performance. Â Speaking of, the receive capabilities of this radio are outstanding, and was one of my biggest draws. Â Back to the filters; Â I had contemplated beefing up my Yaesu FT-817ND, and adding an optional static bandpass filter, of which the radio can only take one (or two if you use the W4RT dual filter), and the BHI DSP module, but ultimately I thought it would be better to save my money and go with a radio with a more modern architecture. Â Don't get me wrong, I still very much like my 817nd and recommend the purchase for anyone interested, but it's not nearly as powerful or flexible as the Elecraft KX3. Â The filtering really adds to the ears of the radio, and I can pull signals out of the static with relative ease.
Another operating feature that I am enamored by is the CW text decode. Â Simply zero beat a CW signal (either manually or by using the auto-spot feature) and right there on the screen you see the text being sent. Â Even better, you can see what you send as you key your paddles. Â I have mentioned before that I am in the process of learning CW (a.k.a morse code), and am getting closer to operating with it. Â The KX3 will definitely help me shortcut this goal, because: 1) it is forcing me to clean up the code I send, and 2) I can use the text decode as a crutch until I am more comfortable operating CW on the air. Â I should also mention the radio allows you to turn the power down to 0 watts, which is perfect for CW code practice.
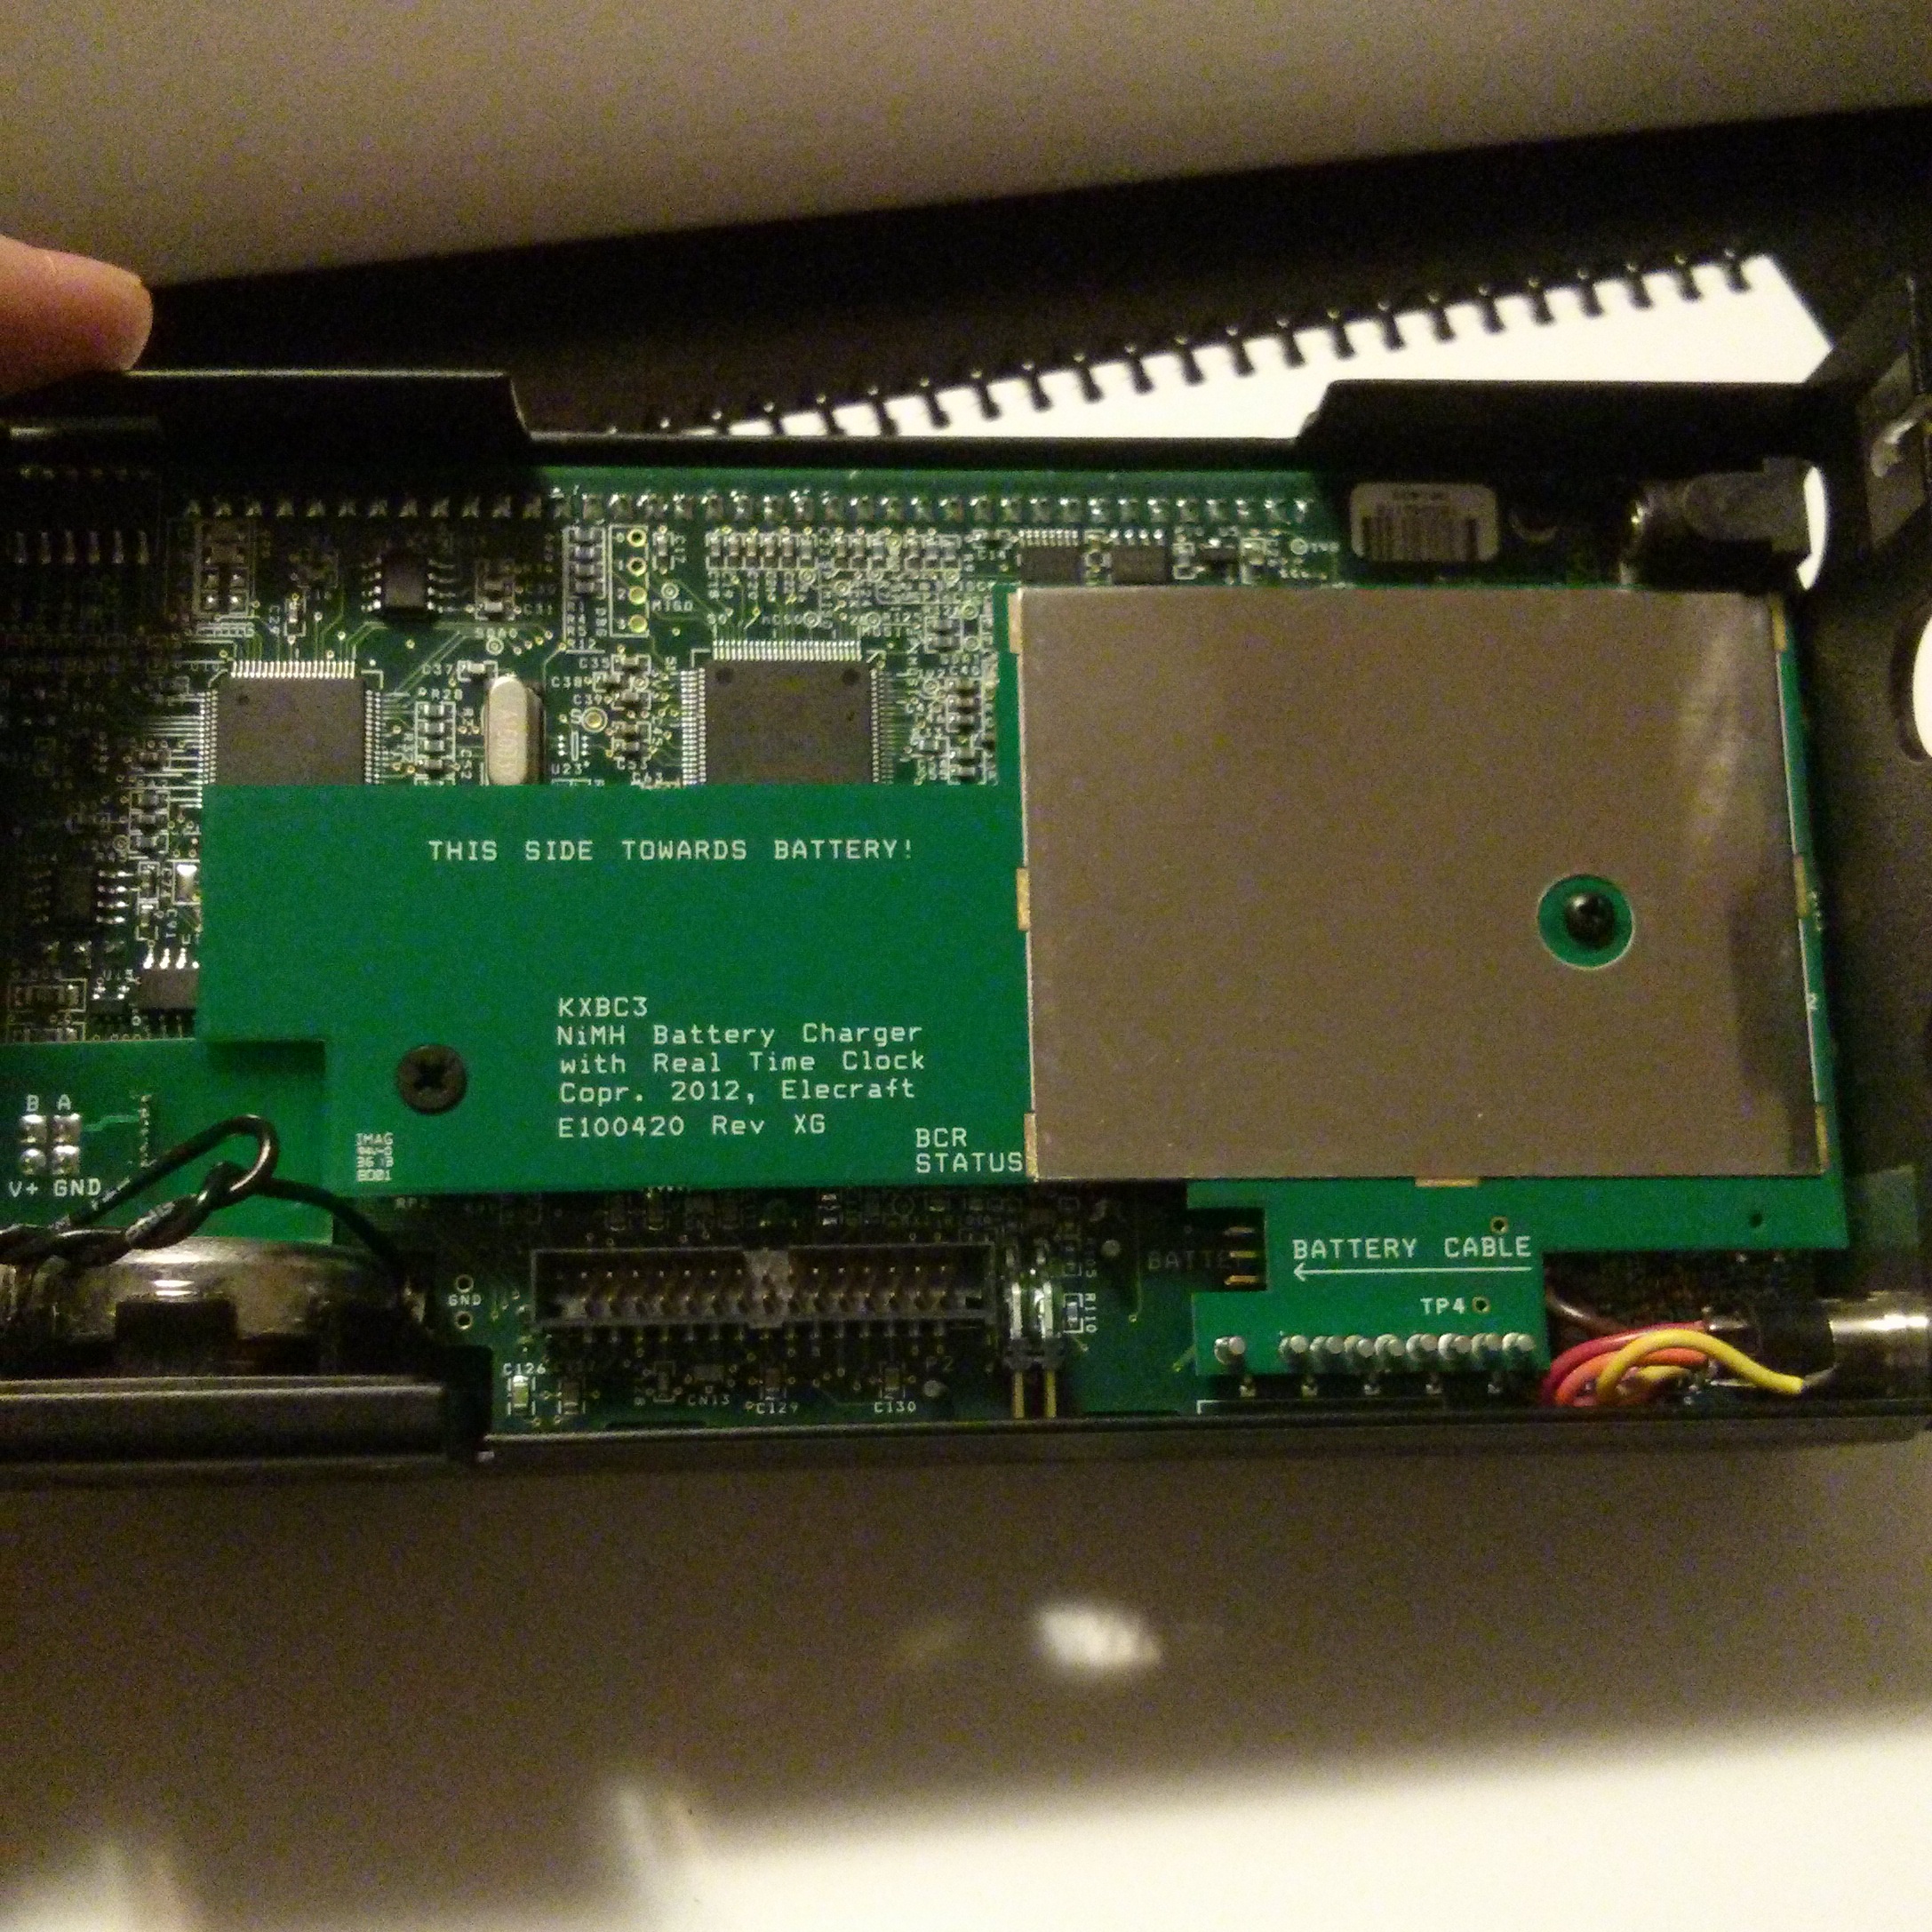
I purchased my KX3 with the optional MH3 hand mic for SSB operation, and the KXBC3 internal battery charger / real time clock.  One operating feature that I've found really handy is the clock, which I have set to UTC time.  When I make a contact, I can press a button and see the time and note it in my log.
Speaking of operation, I've made several contacts on SSB voice between 5 - 10 watts of power, and several PSK31 contacts using 5 watts of power. Â My audio reports have been stellar, which is a testament to the KX3's transmit capabilities.
There are many advanced features of the radio that I'm just beginning to scratch the surface of, through experimentation and reading.  I recommend watching the many YouTube videos that K4ATZ has put together about this radio.
One drawback of the radio is that it is prone to overheating if using continuous modes (like digital modes) for a long period of time.  There are internal circuits that will protect the radio, so you don't need to worry about burning it out, but RF power will be scaled back or cut completely if the PA temperature gets too hot.  I actually experienced this once thus far having a rather lengthy rag chew using PSK31 with 5 watts power.  Lesson is, let the other guy talk.  If the default heat sink is not sufficient in the long term, there are several after market heat sinks that are sold online that mitigate this.  Personally I'm going to stick with the default for the time being.
Another slight drawback is the need for an external power source. Â The KX3 does not come with a wall wart, as it is assumed that most people with higher end ham radio gear will have an external DC power source. Â I did not, but I was able to purchase a 13.8v 4 amp linear power supply from Amazon for less than $30. Â I chose a linear supply, since switching power supplies are often prone to RFI.
Using the KX3 for SWL
As is common for many ham radio operators, I also enjoy listening to shortwave radio, and the KX3 doesn't disappoint. Â However, this radio is first and foremost a ham radio tranceiver.The KX3 offers AM reception and continuous receive coverage across the whole shortwave spectrum, and its big tuning knob and ability to directly enter a frequency makes it quite convenient to operate as a shortwave radio.
One drawback is that the maximum bandwidth offered by the radio's DSP filters is 4 kHz. Â For shortwave broadcast 6 kHz would be ideal; but this is not as big of a limitation as you might think. Â The way the KX3 processes the sound, increases the fidelity of the 4 kHz signal by a great deal. Â I have really enjoyed the sound quality, even while using the stock speaker. Â I rarely use headphones while operating, and the speaker sounds perfectly fine to me; although I'm sure it's not as good as a pair of high quality headphones or a pricey speaker.
I'm not sure if it's technically possible for the Elecraft team to increase the AM bandwidth, but if it were I'd be in support. Â But, it's certainly not critical.
I have yet to try pulling out a very weak shortwave broadcaster out of the static, but I am going to assume that the KX3 will really shine, in the same manner I have pulled in weak ham transmissions.
I did not purchase the KX3 with the internal auto-tuner, as I already owned an Elecraft T1 autotuner. Â If you are very serious about SWLing on the KX3, purchase the KXAT3 option, as it will auto-tune to the band you are in even in receive mode. Â To use the Elecraft T1 (or any other auto-tuner) you will need to transmit to tune the antenna. Â This can be a burden if you bounce between bands. Â In fact, at some point I plan to add the KXAT3 option to my radio; it just didn't make the initial cut.
If you are interested more on this topic, Thomas over at swling.com, has an excellent write up on using the KX3 for SWL.
Building the KX3
I would normally try to document the assembly in detail, but there really is no need.  Elecraft's assembly manual is top notch.  If you follow it you will not have a problem building your kit.  There are a few YouTube videos that document building a KX3.  I particularly enjoyed the humorous video K7AGE put together.
One tip I do recommend is to use a ruler to measure the length of each screw prior to placement. Â Many of the screws will look similar and may even fit in the hole correctly, but ultimately are the incorrect part.
Here are several pictures I took documenting the KX3 assembly. Â In all, I believe the build took me about four hours, from opening the box to powering it up.
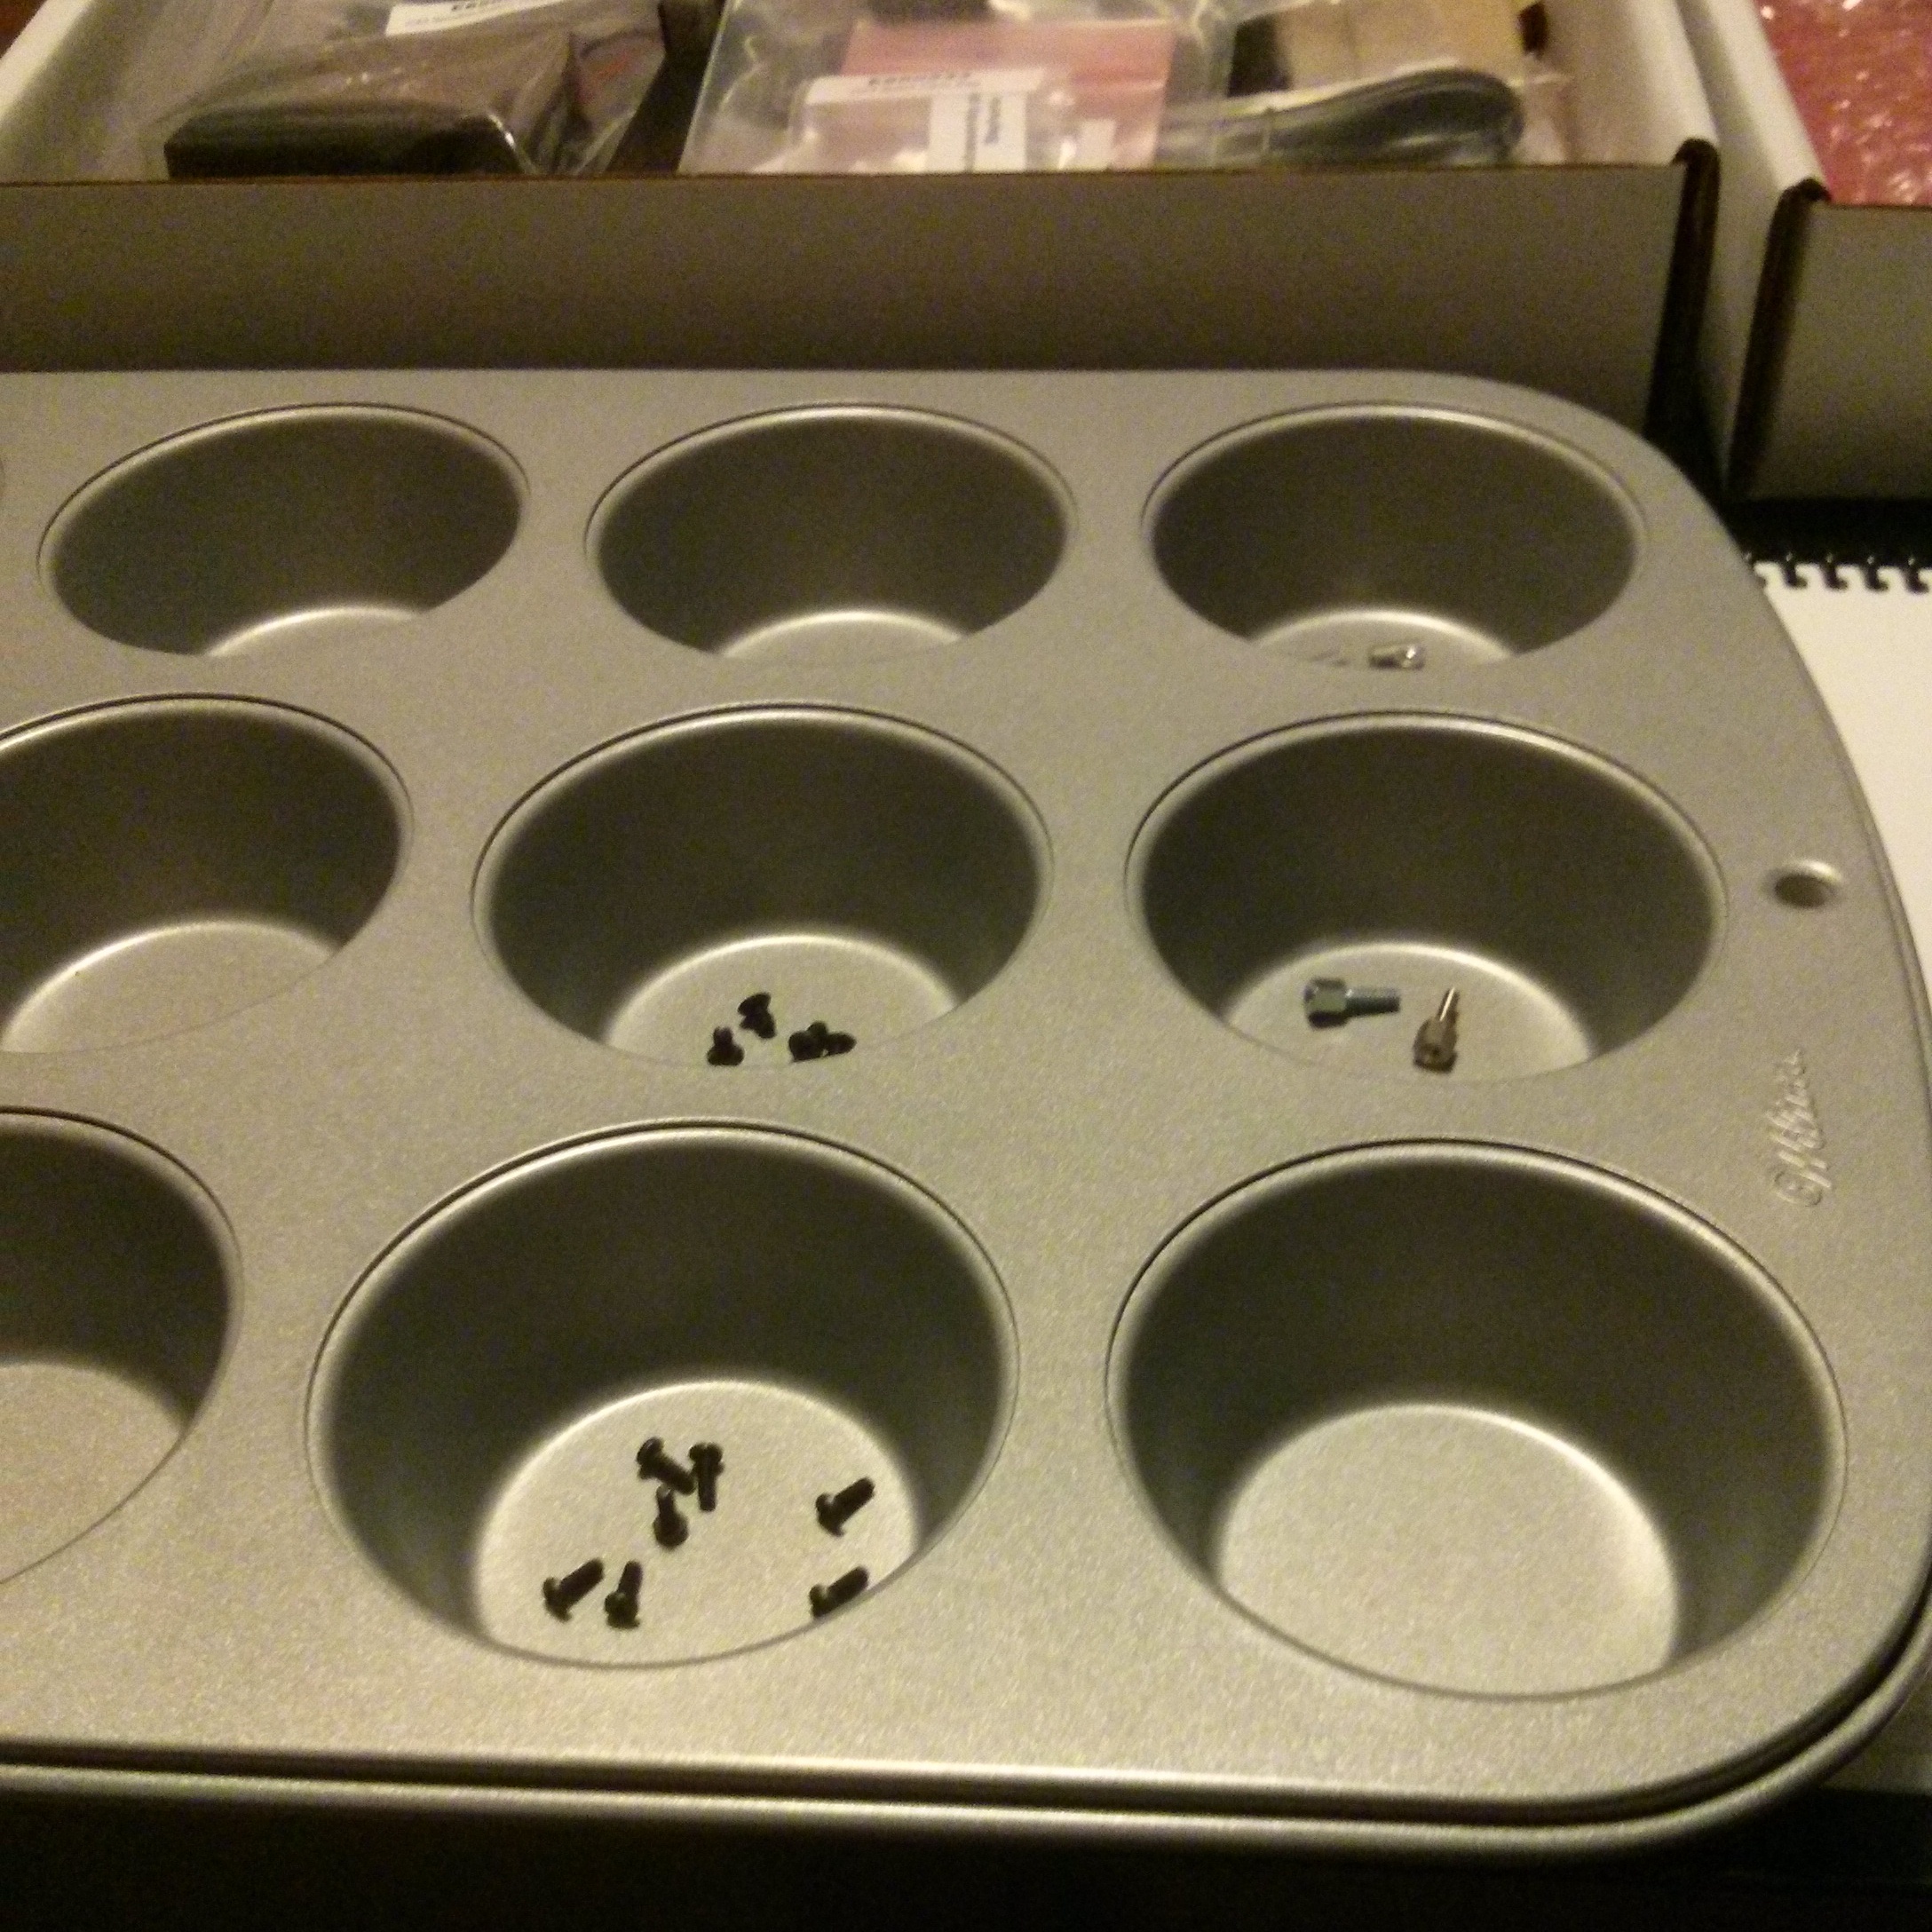
It's a good idea to use a muffin tray to sort out small parts.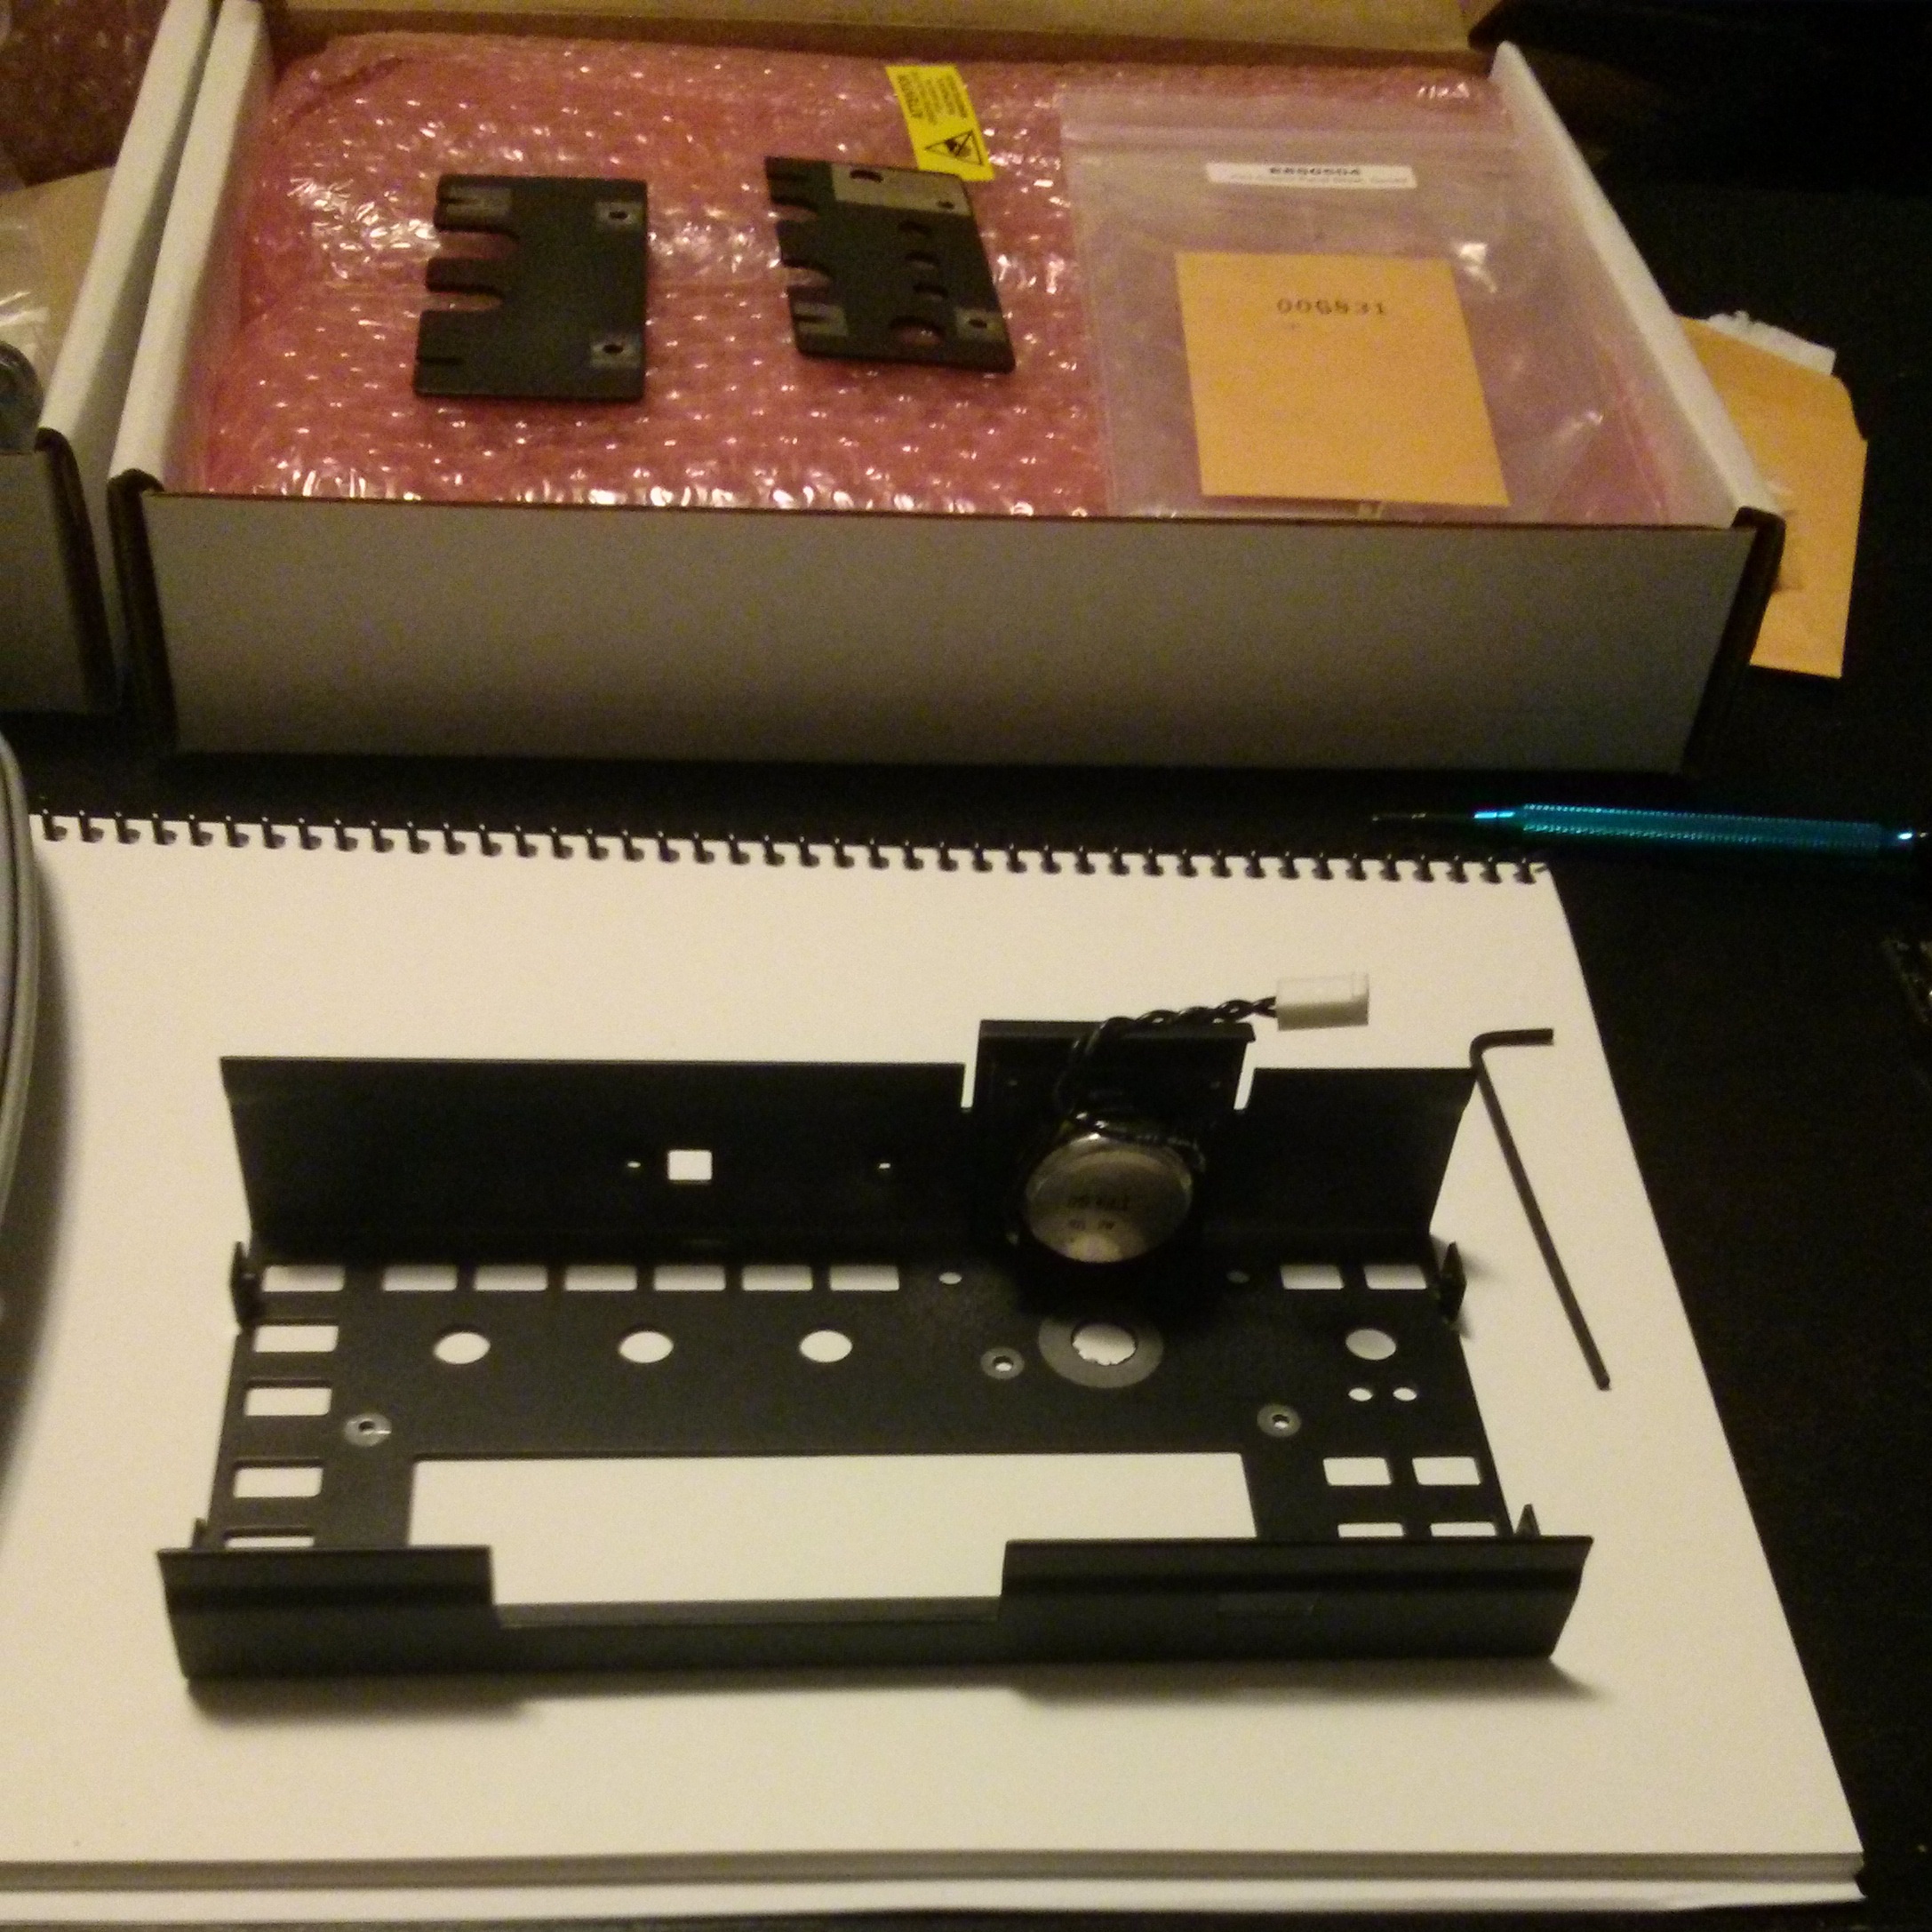
Here is the front panel in its initial assembly stages.
Front panel assembled!
Here it is from the front.
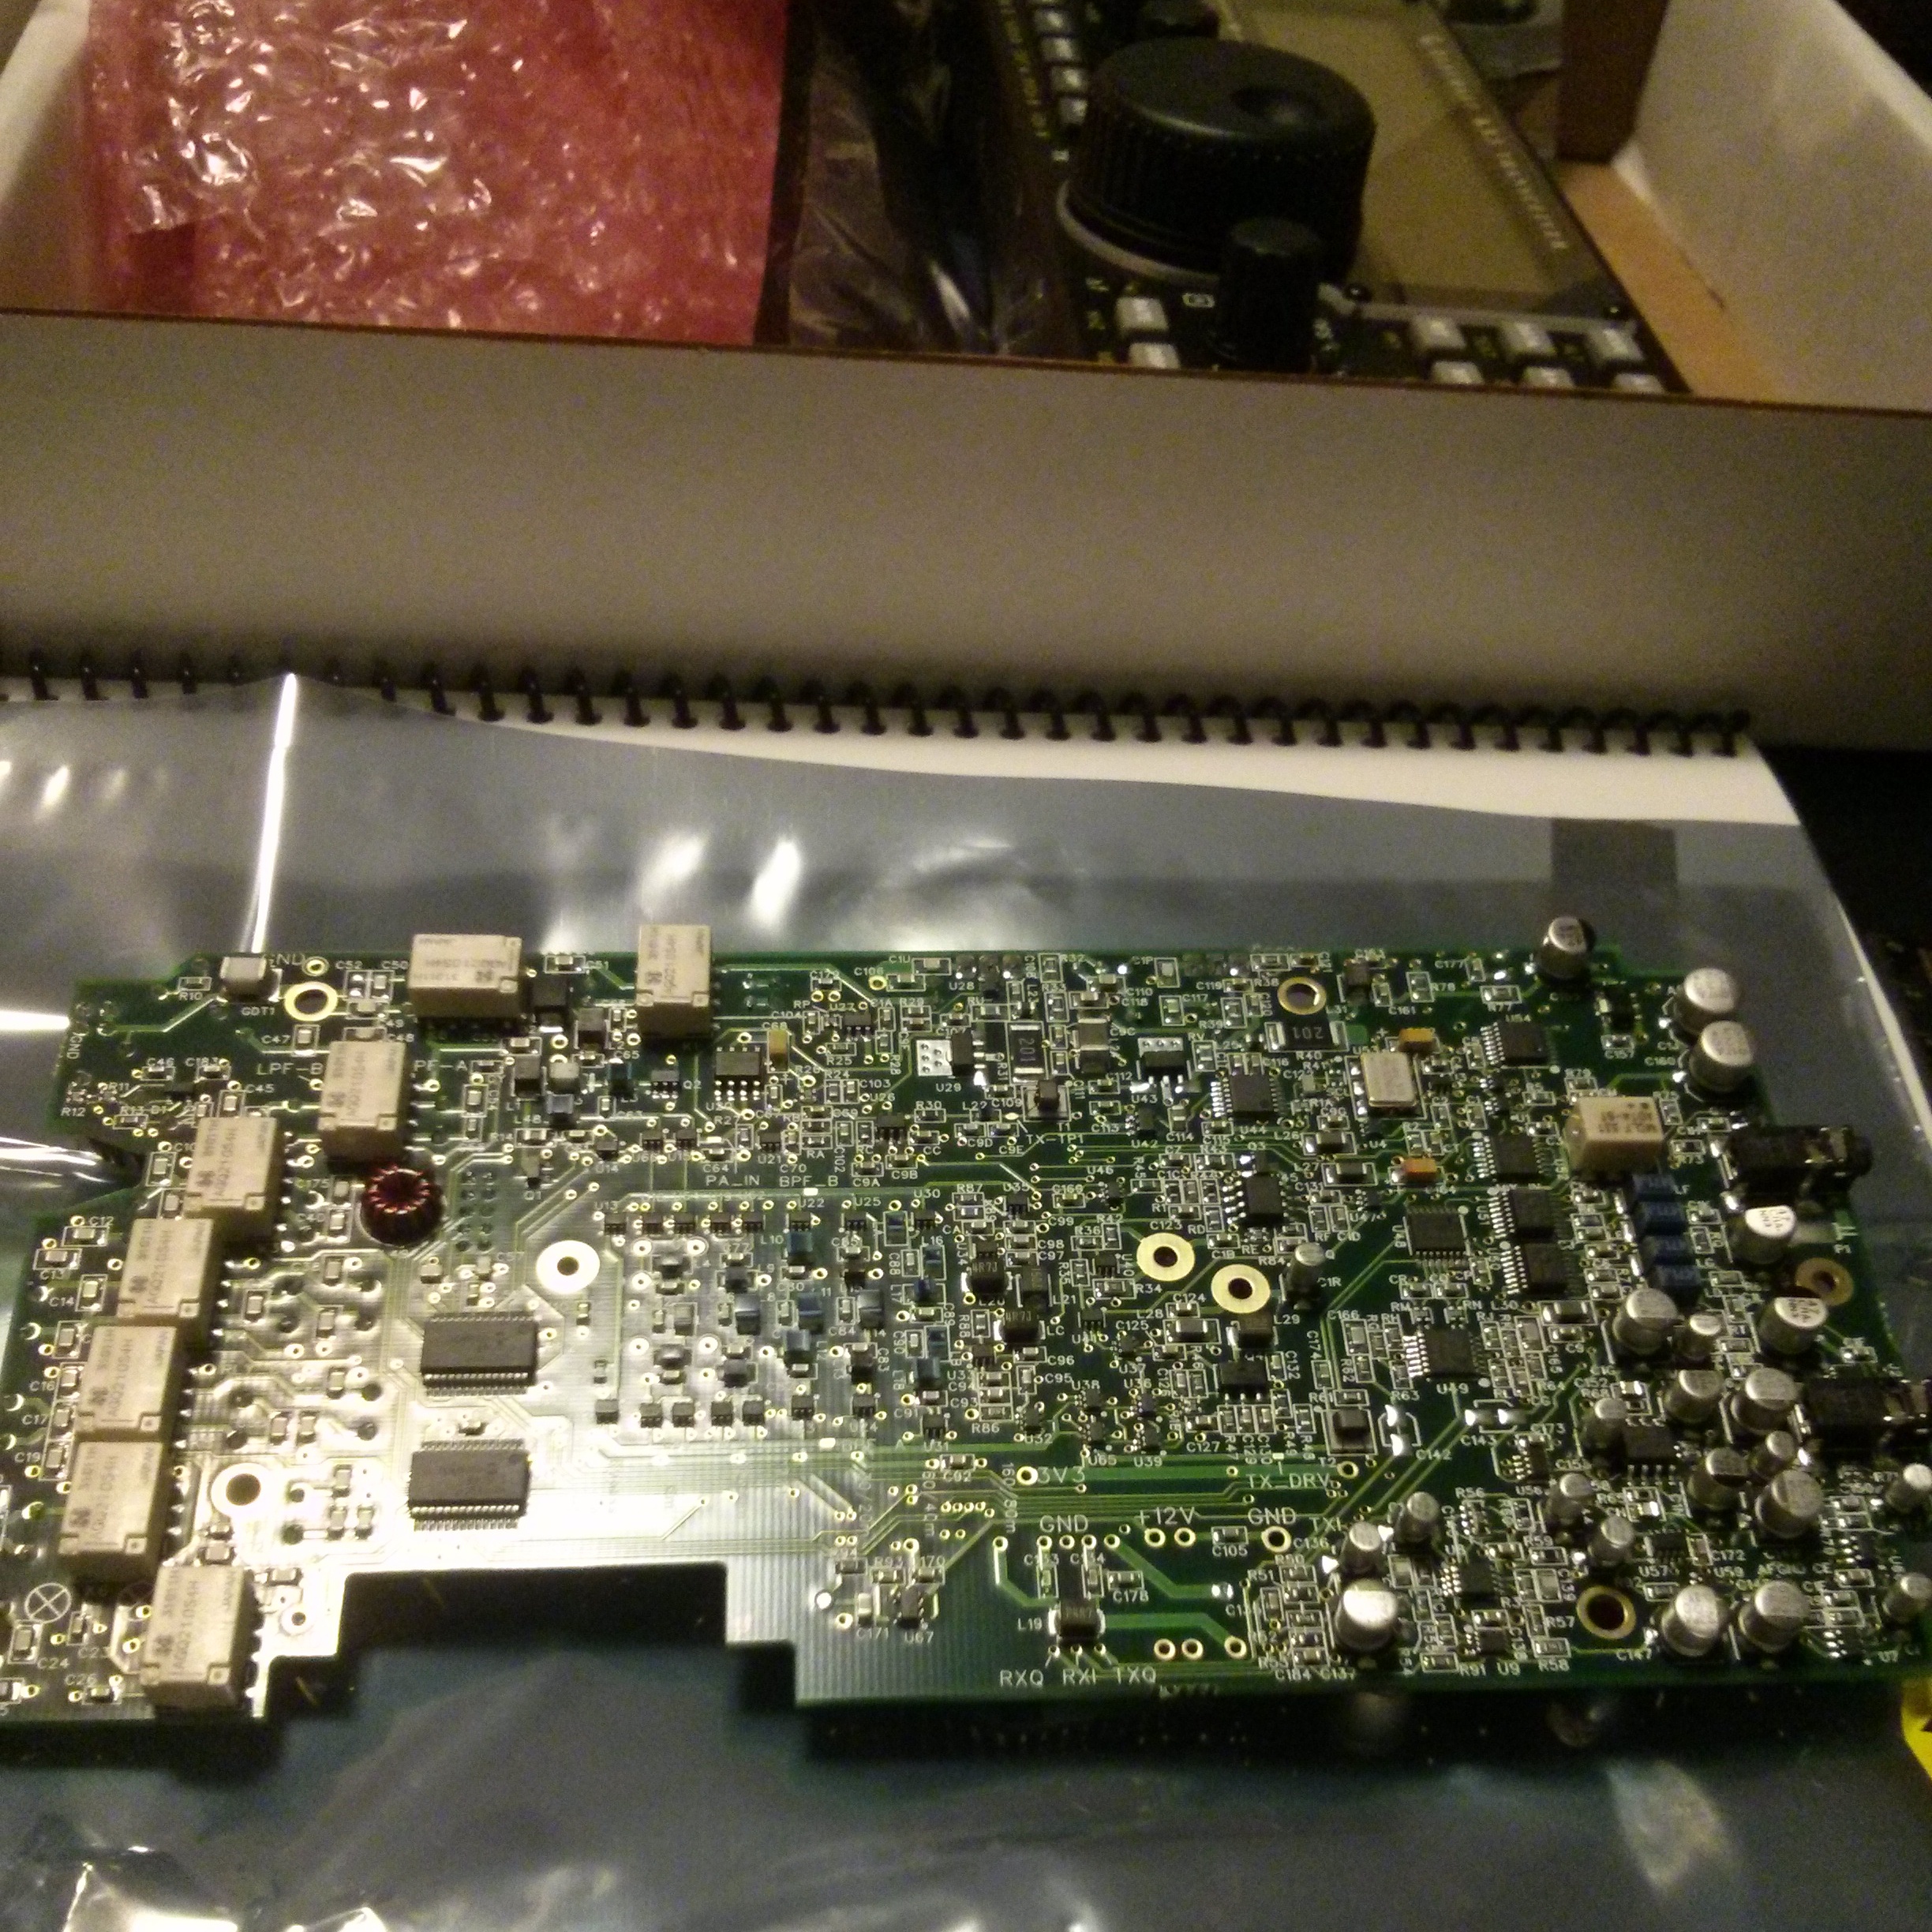
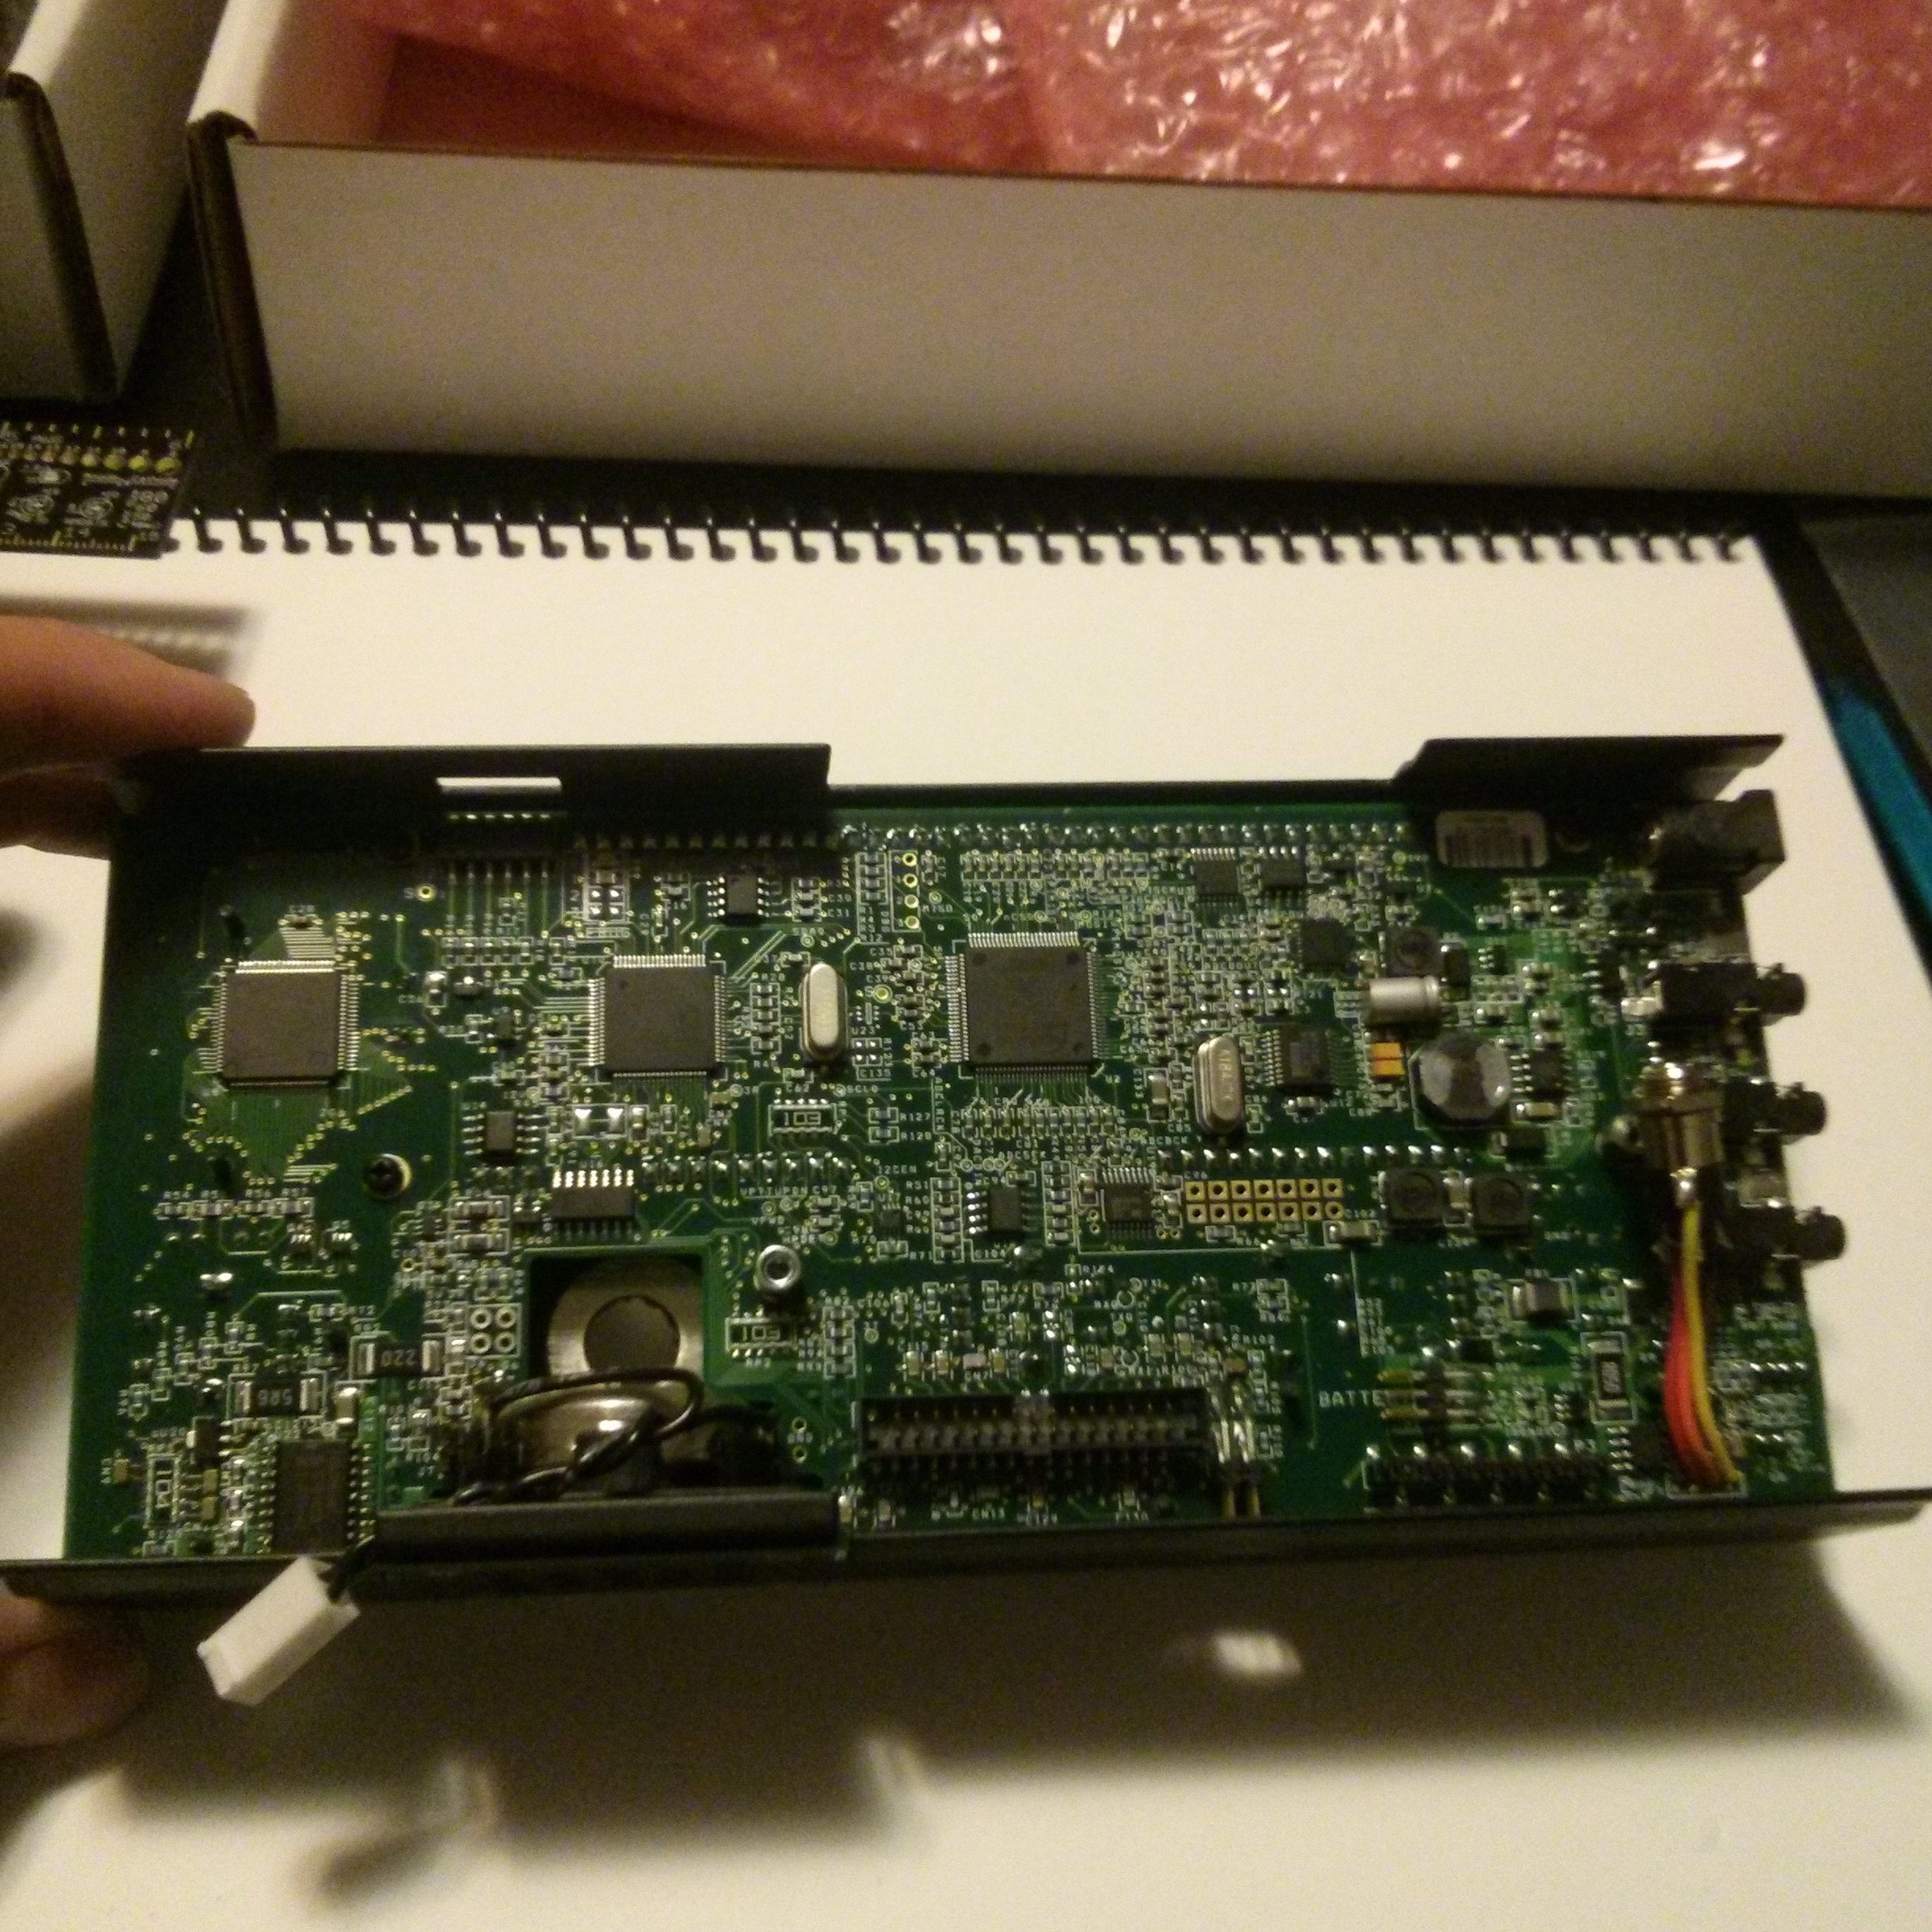
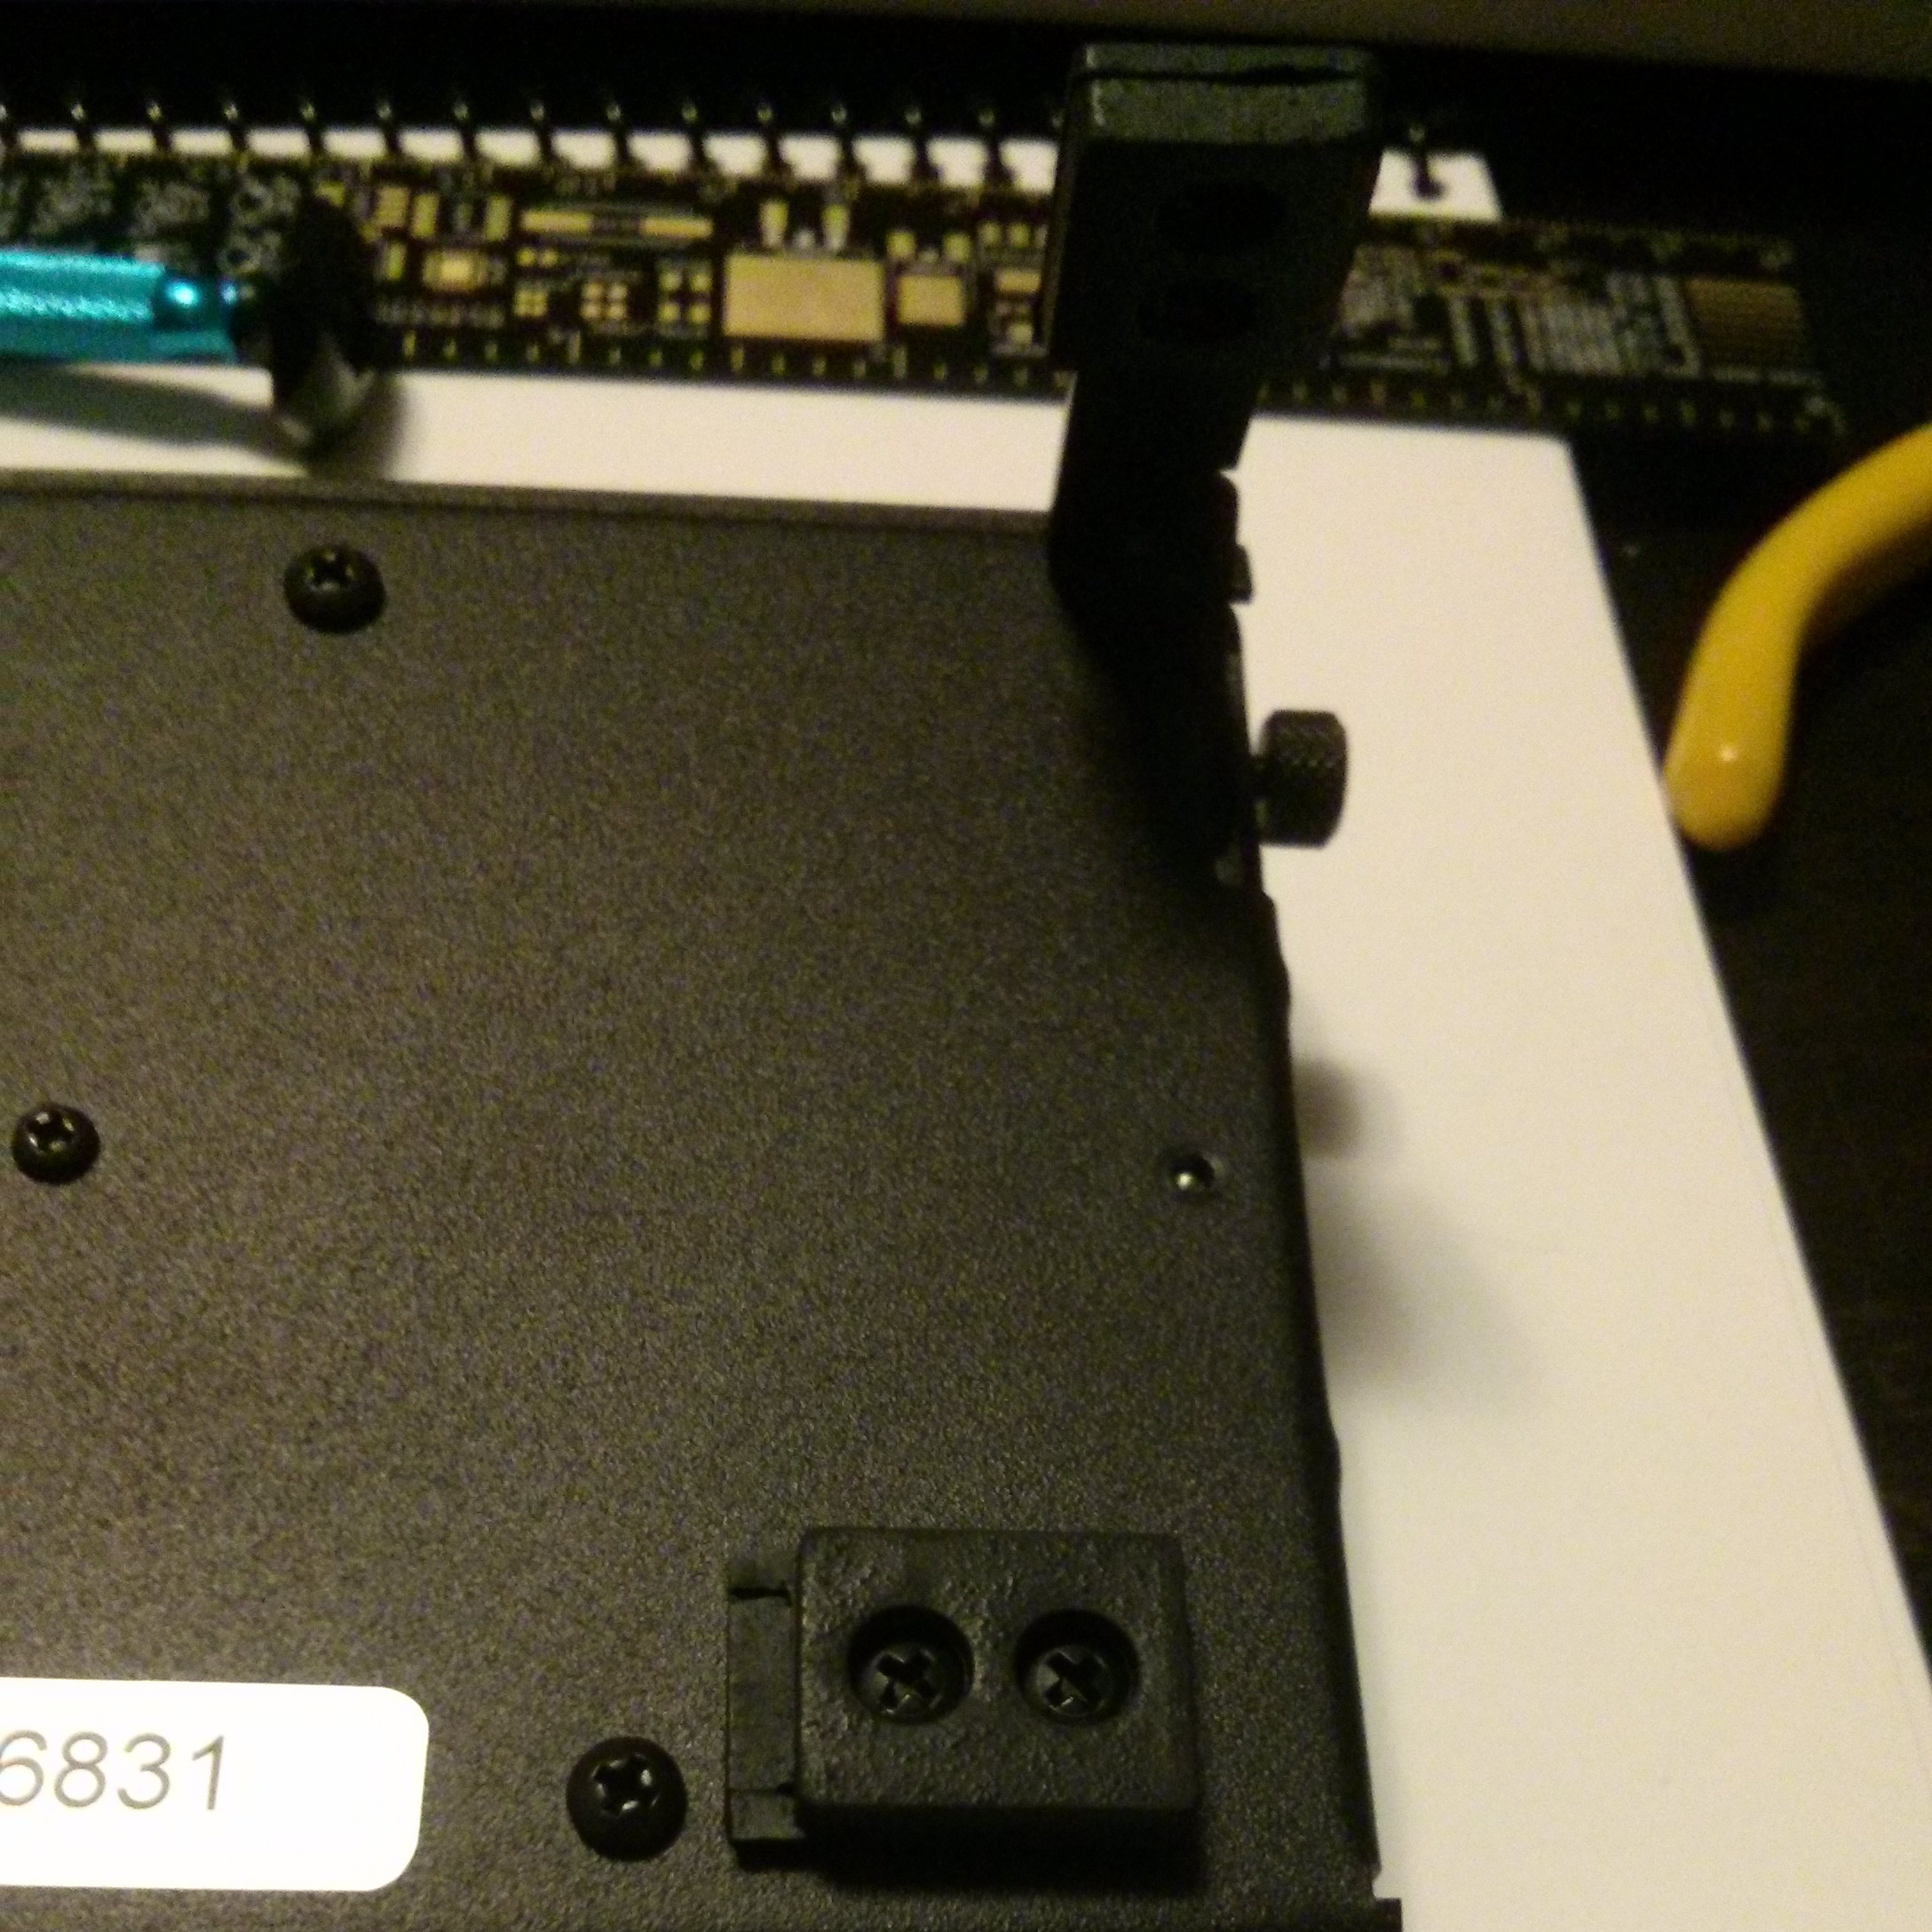
This is the back side of the RF board. Â Wow! Â I had to take a picture of it; it looks like a borg ship.
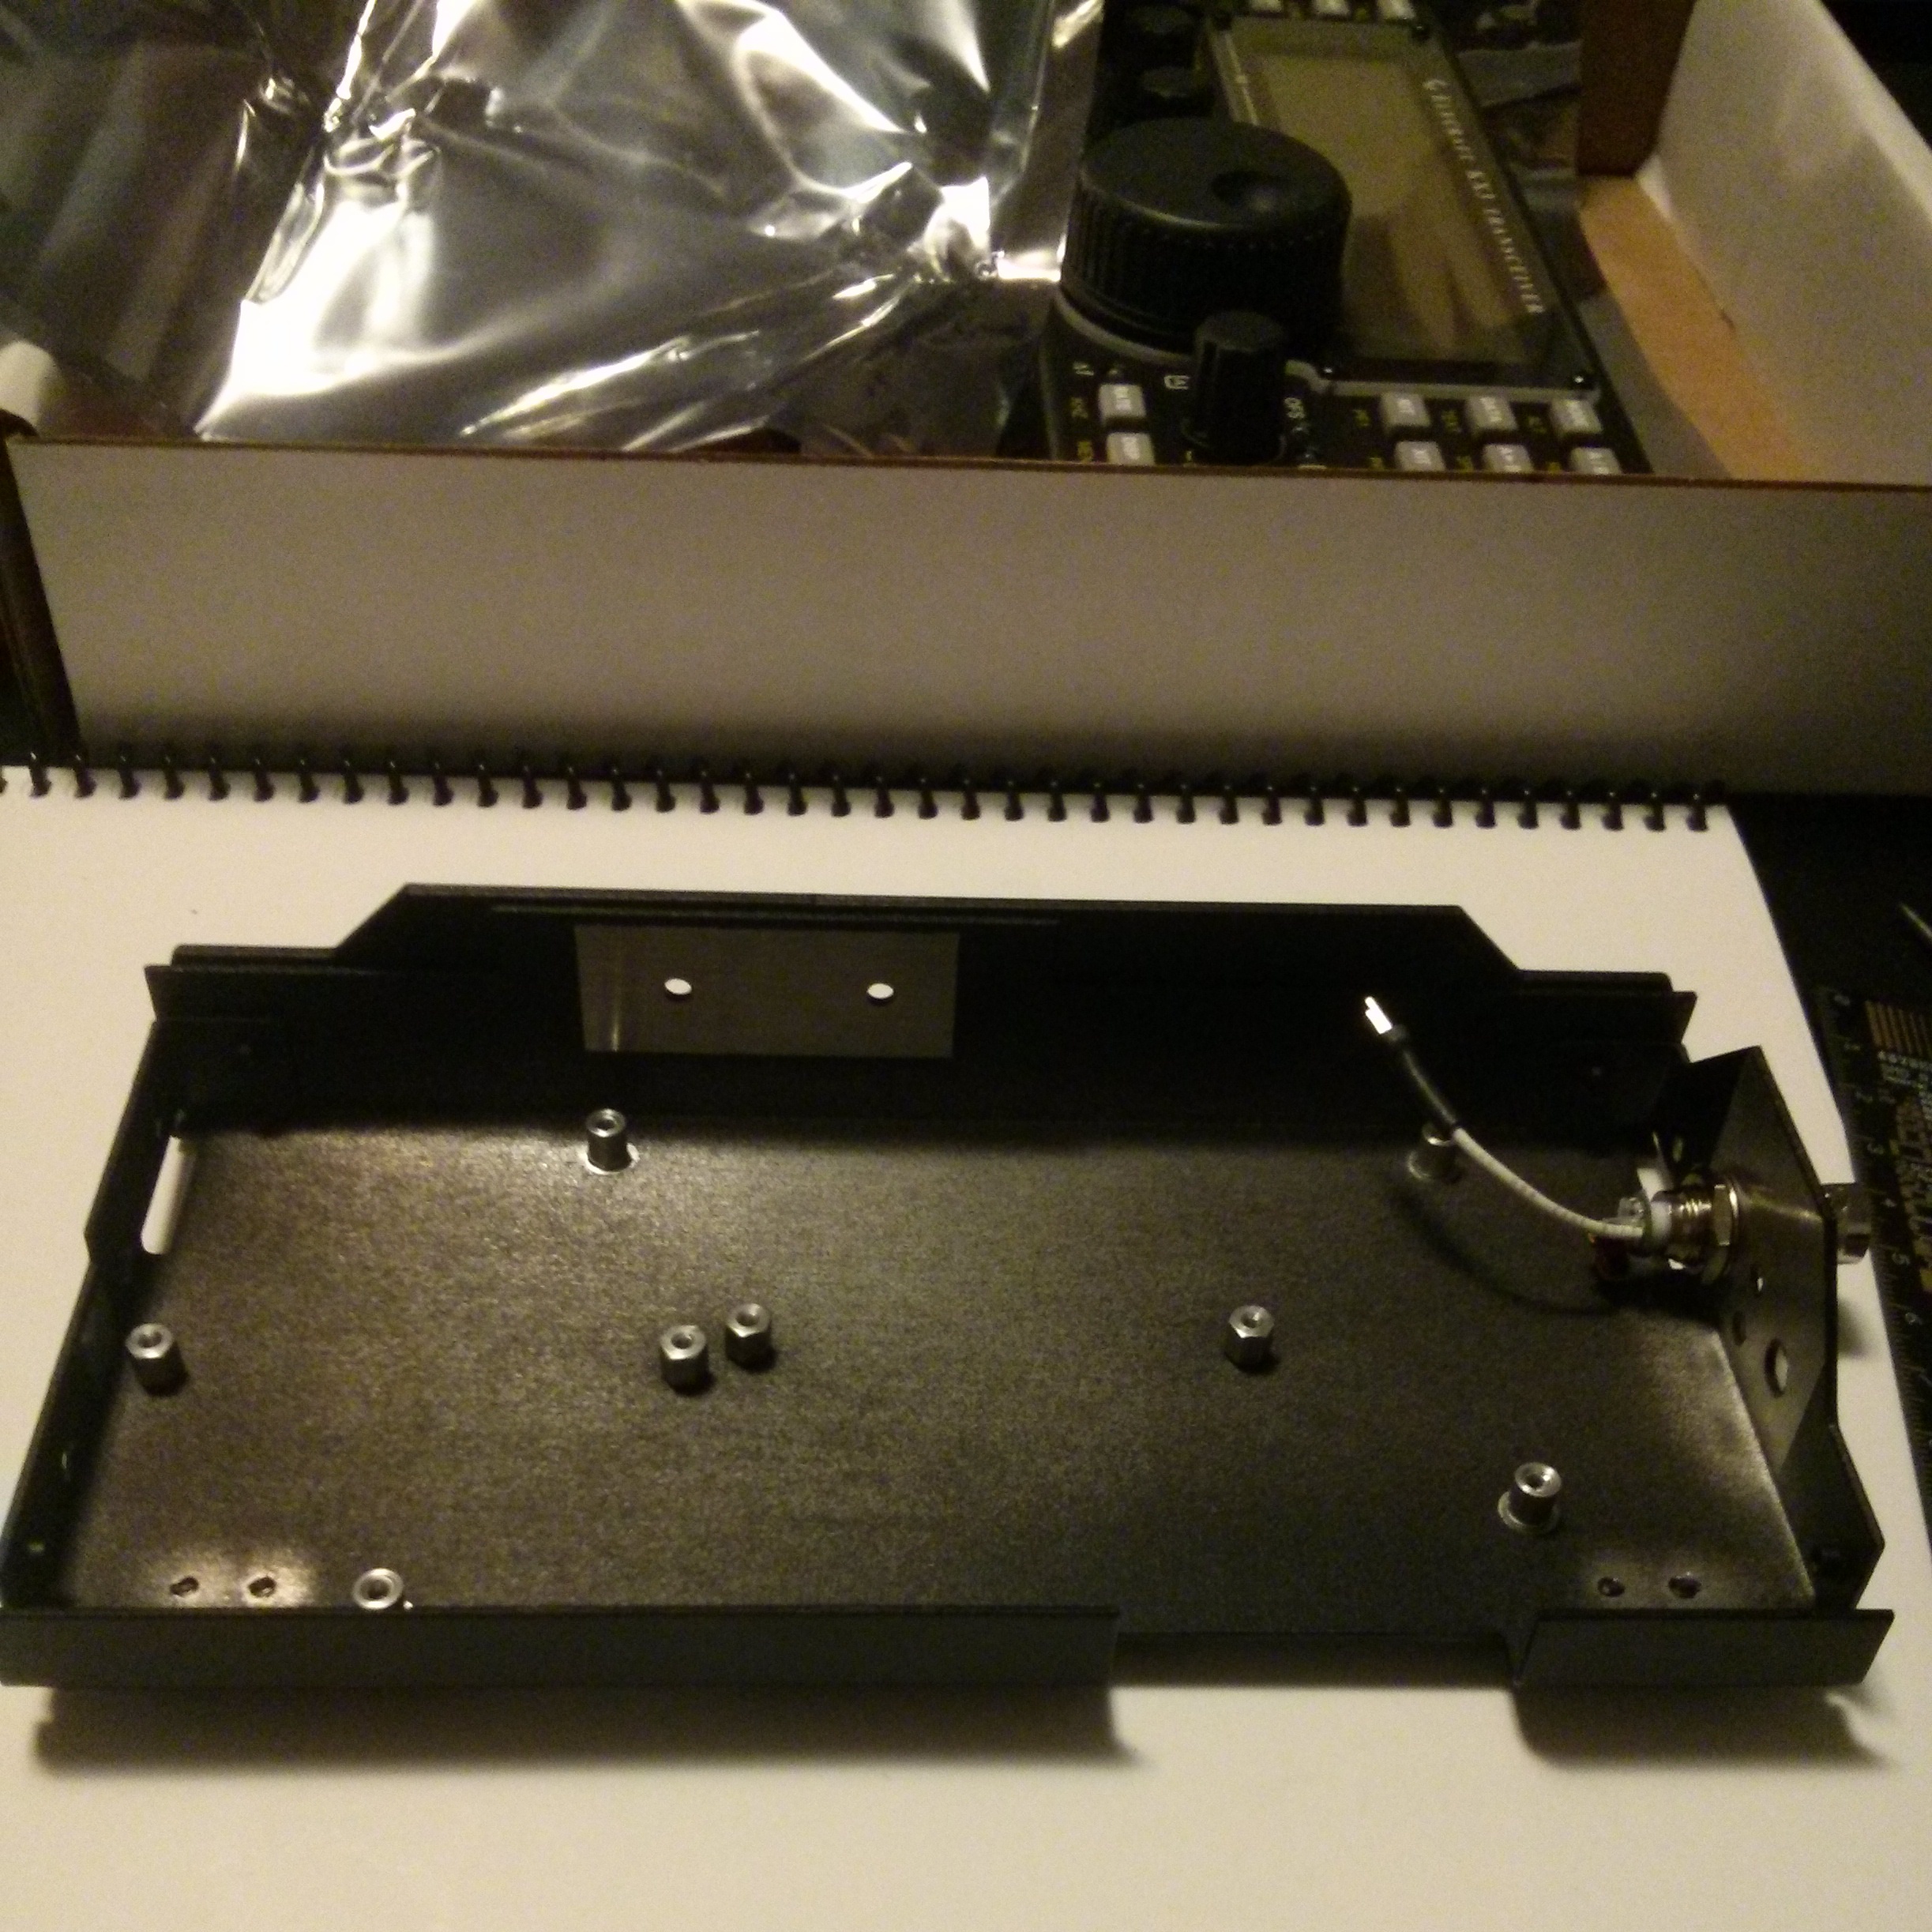
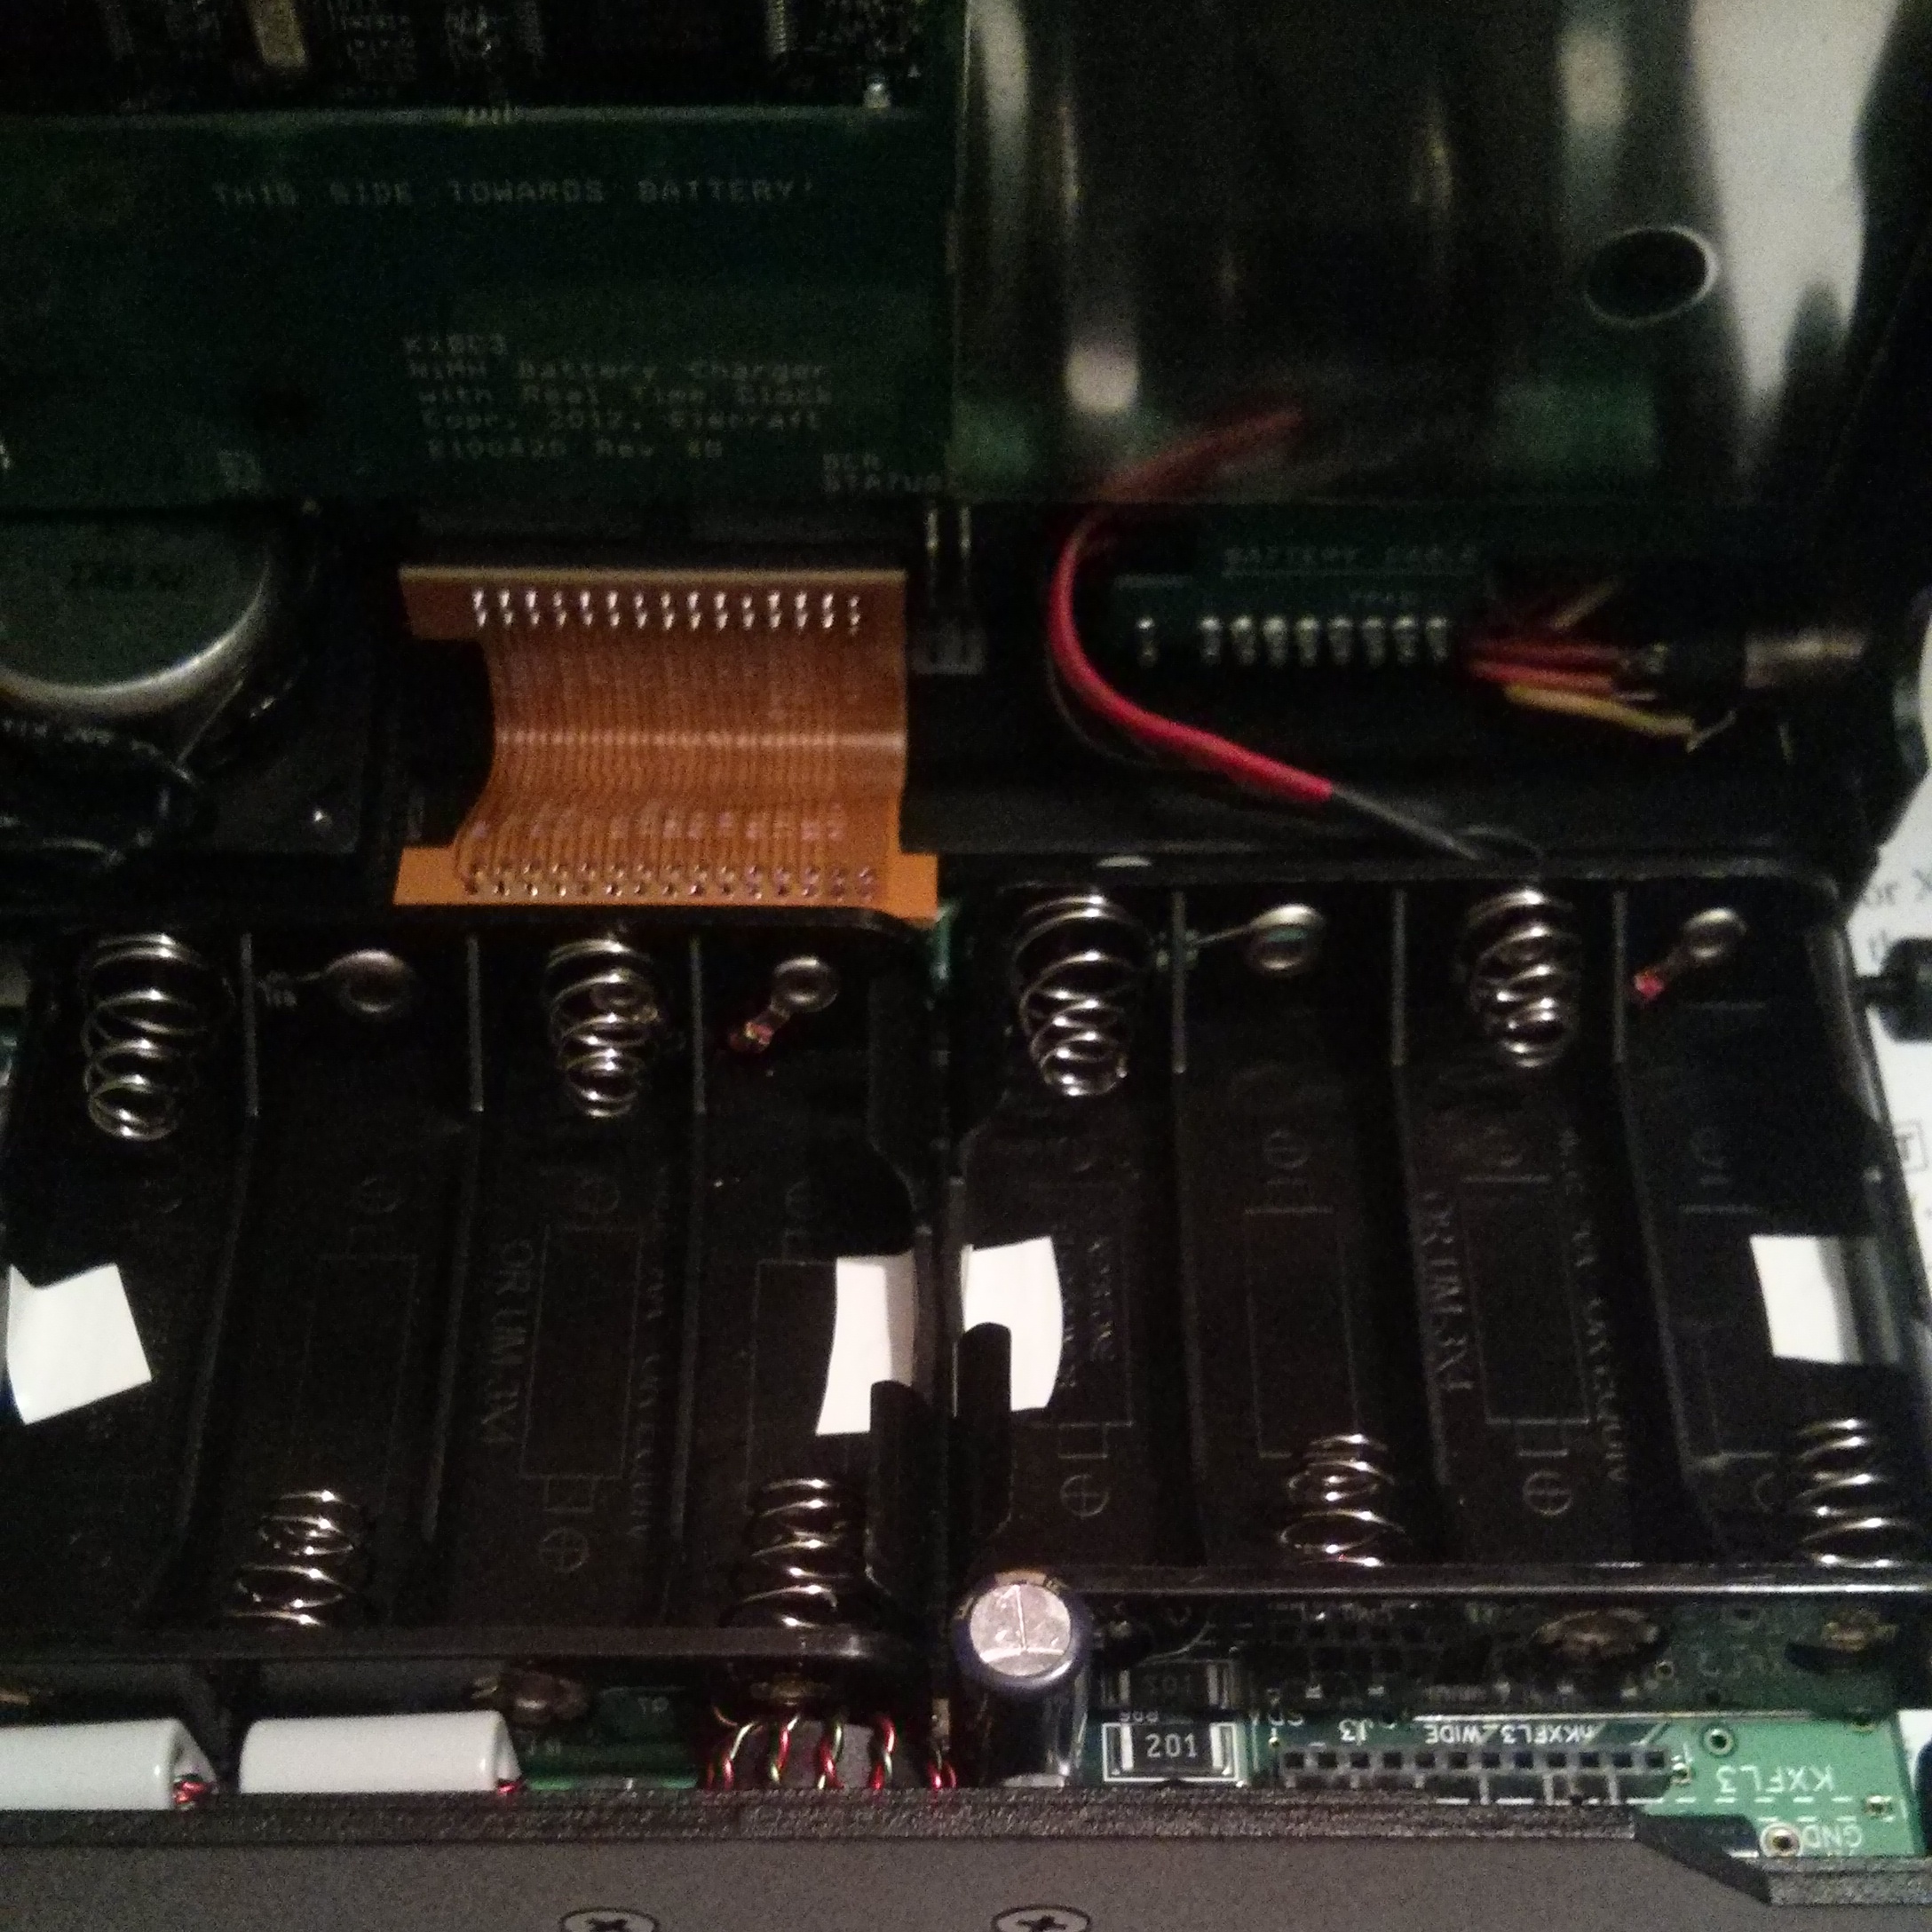
RF board and battery holder installed.

Whoops! Â The only problem I had during the assembly was that after I installed the battery holder, one of the screws on the opposite side of the standoff came loose. Â It would not tighten again, and eventually fell out along with the washer on the reverse side, under the RF board! Â The standoff was still secured by the top screw/washer, so I decided that it was not worth it to take the whole RF board apart and potentially damage a component for this one screw. Â Everything is solid inside, so I don't think this screw will be missed.
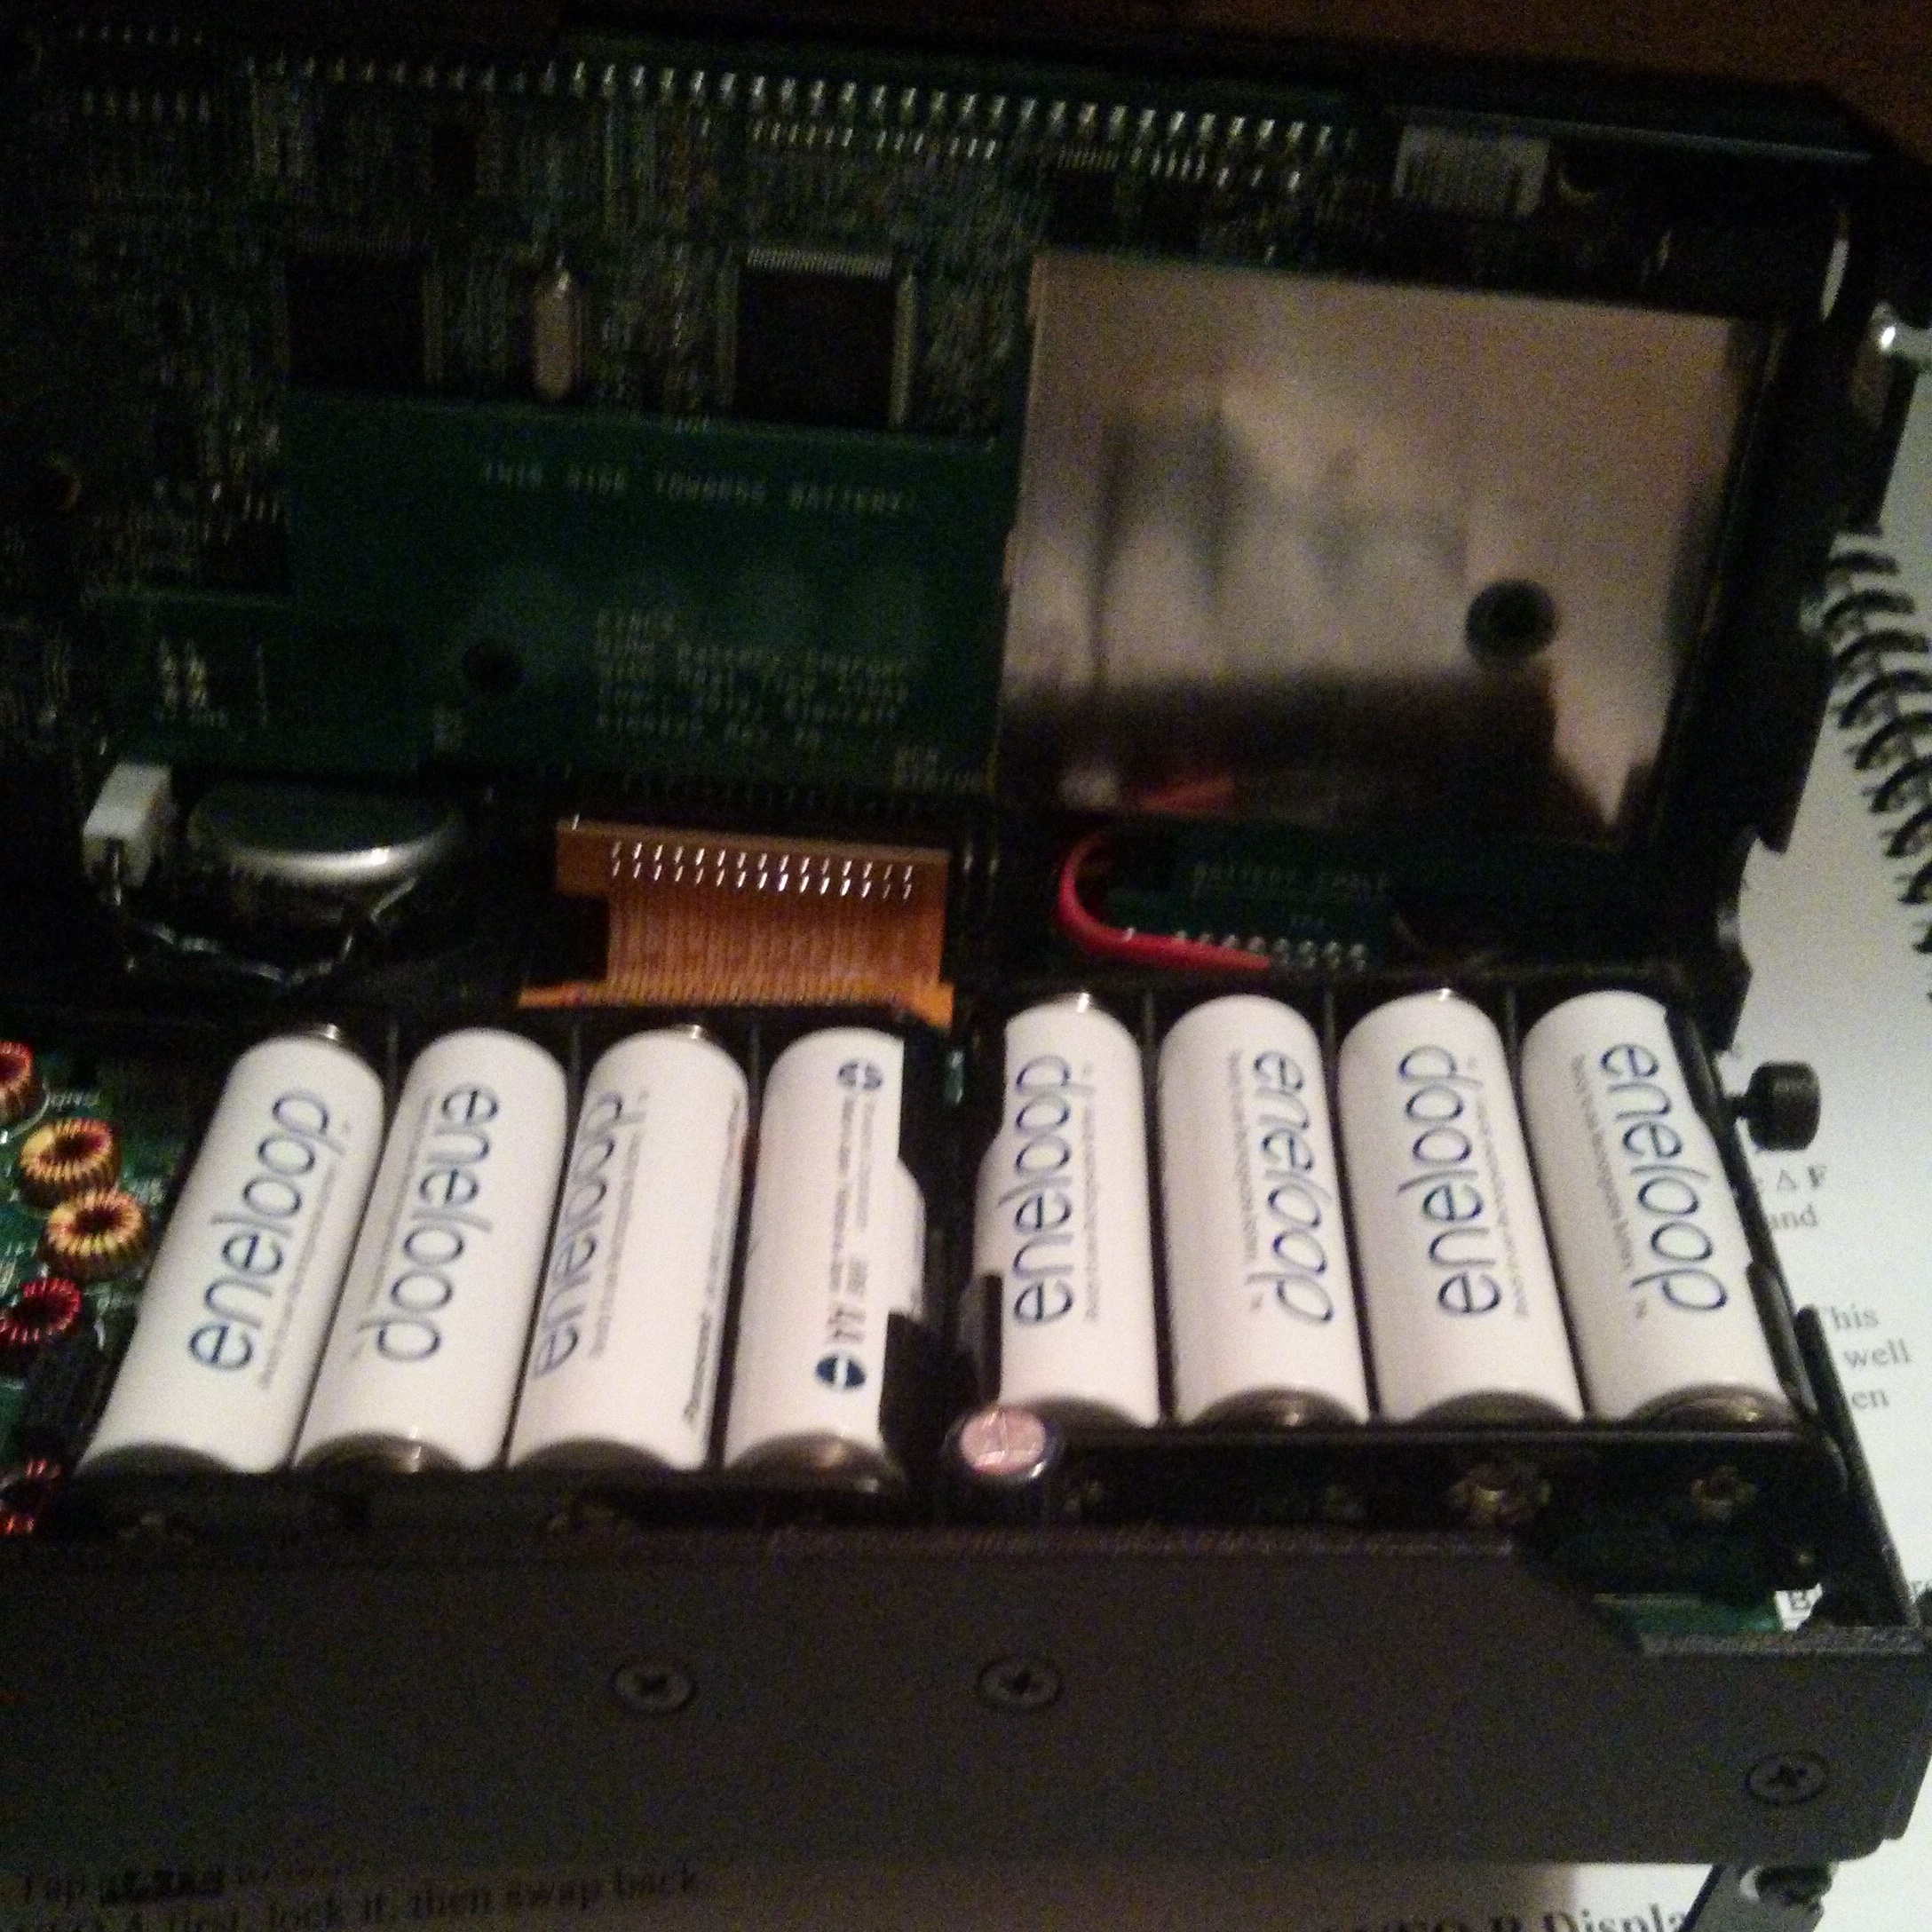
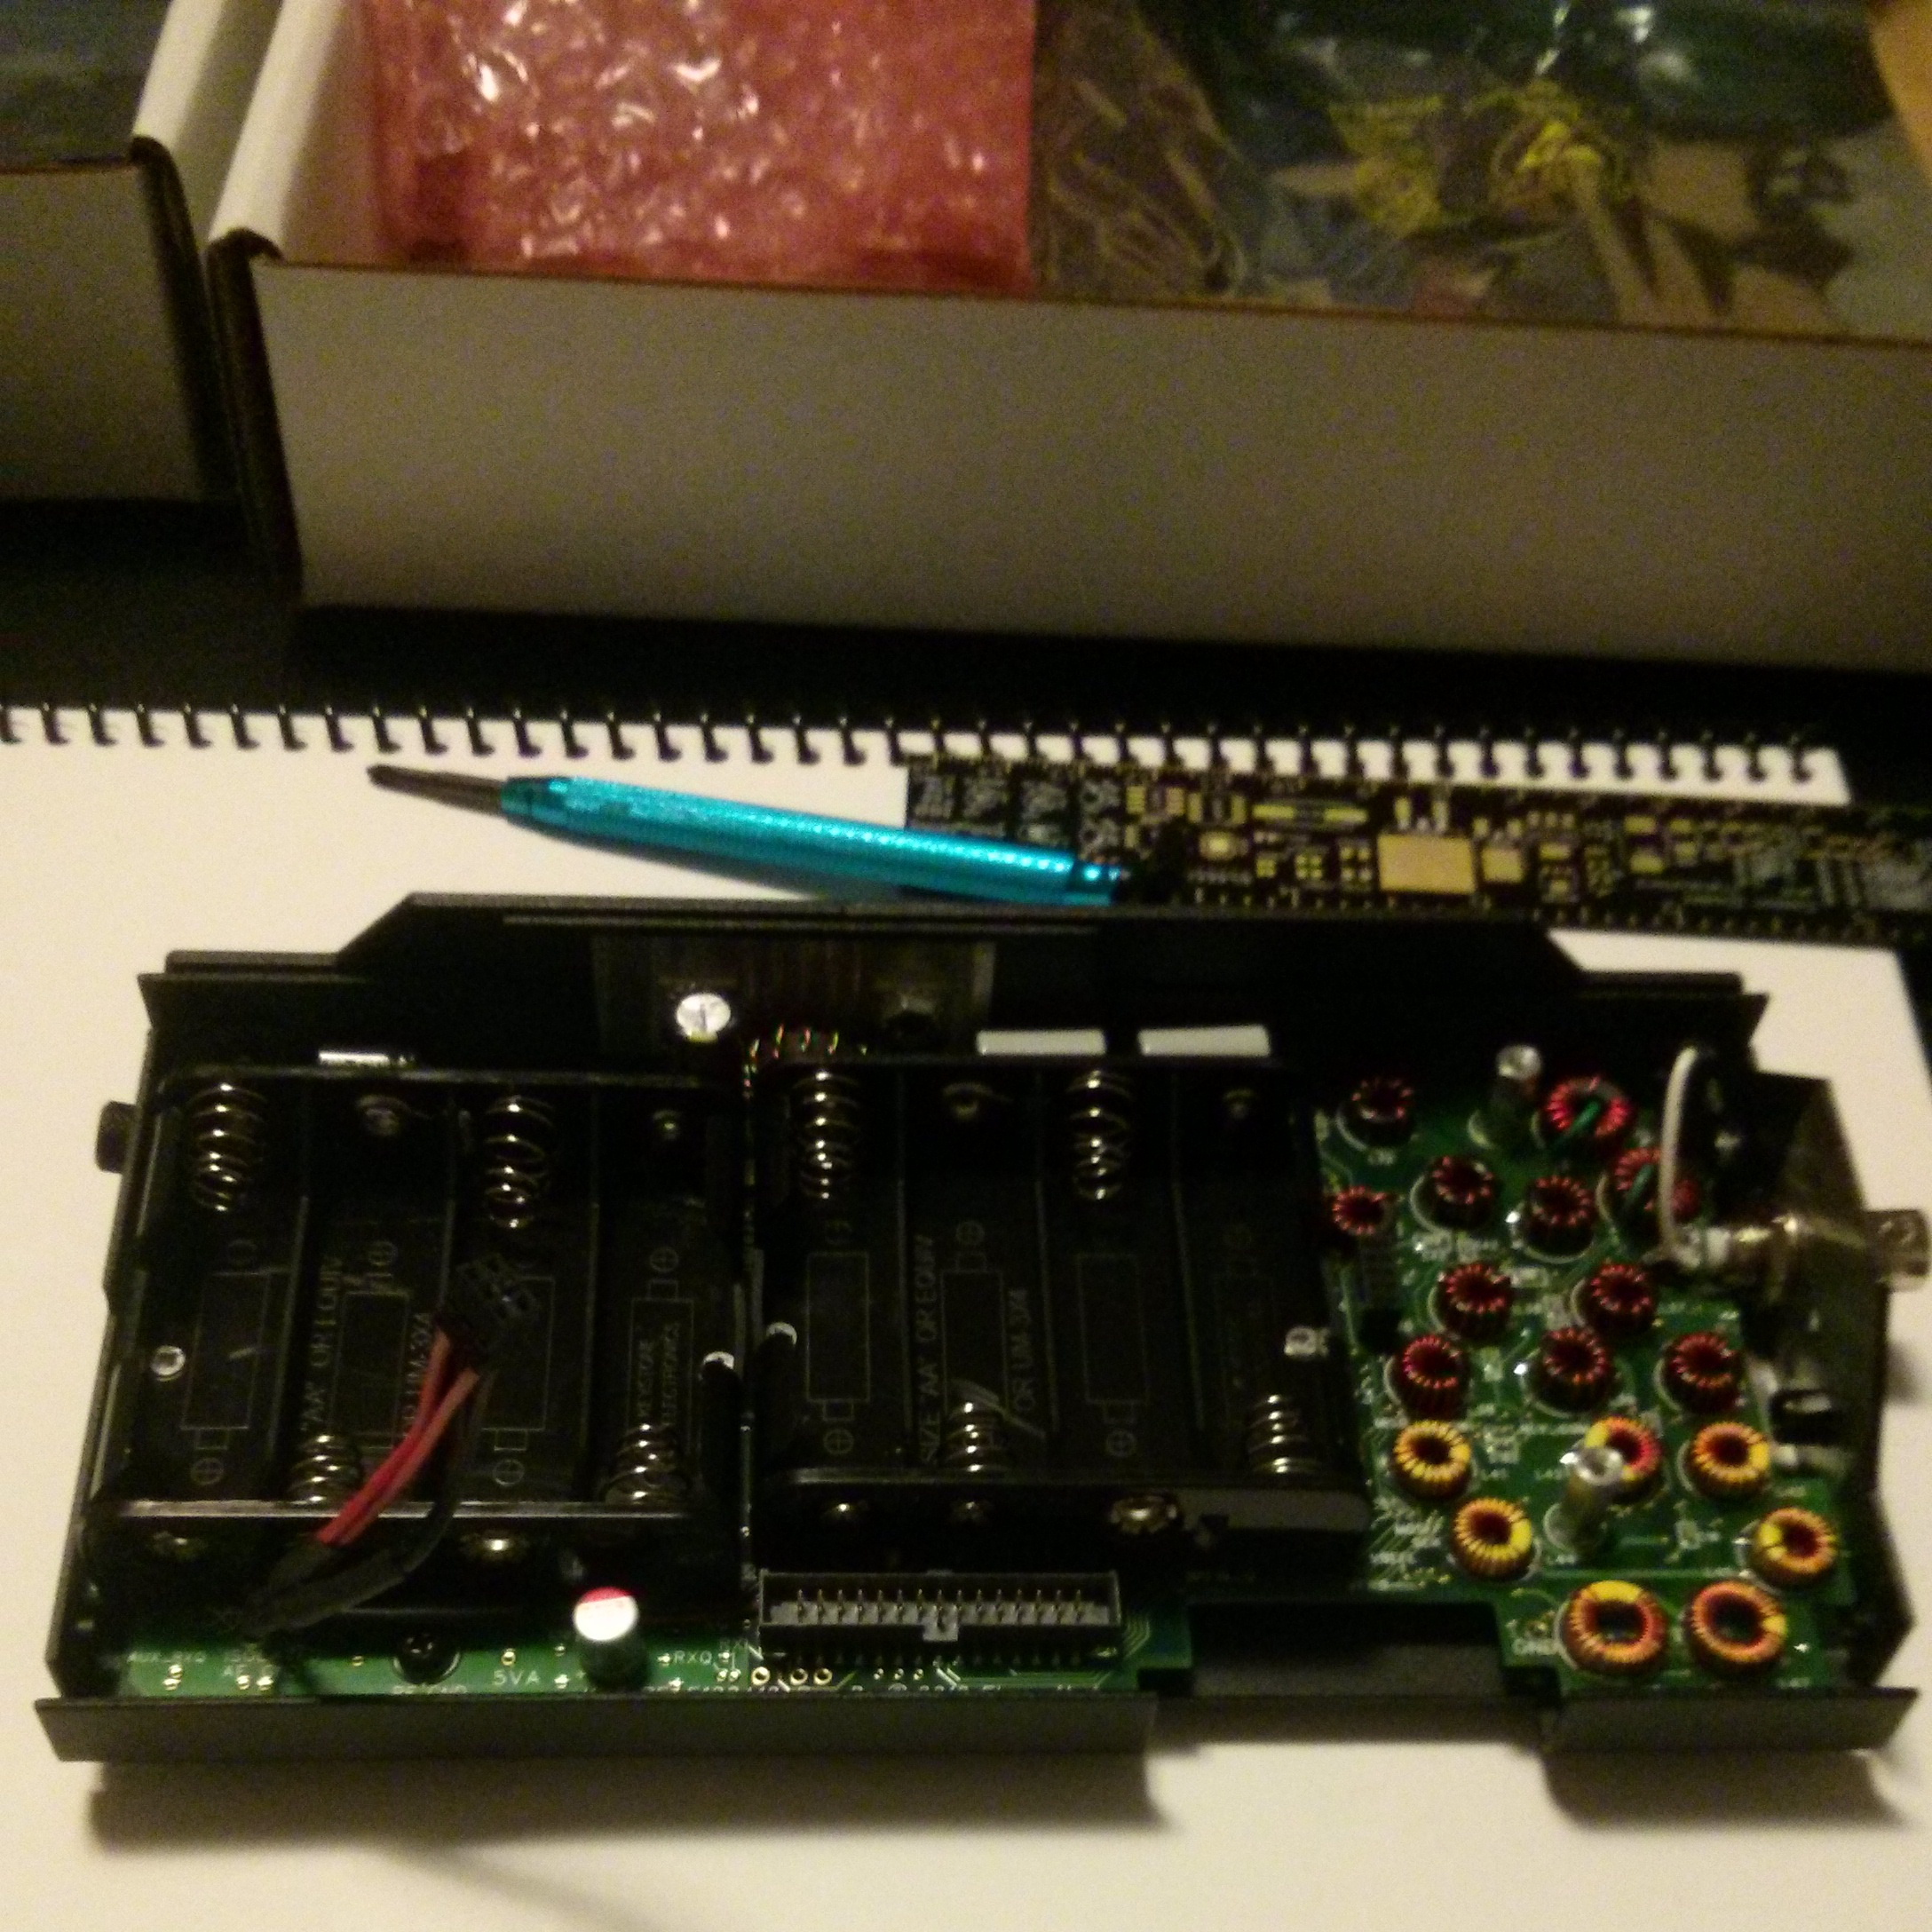
I installed eight Eneloop NiMH batteries into the case for portable operation. Â Eneloop's are great batteries for a radio like this. Â The batteries have a flat discharge curve, meaning that they will keep a relatively even voltage for the life of the charge. Â These particular Eneloop's have 2000 mAh, and supply the radio with 8.5 - 11v depending where they are in the charge. Â For most of the charge, they sit at around 9.6v. Â Thus far I've had to charge them up twice using the internal charger, which is pretty decent considering I've used the radio a lot and I've mainly used it on battery power (much more time in receive than transmit).
One small gripe, it's very hard to remove the batteries from the internal holders. Â I wanted to take one of the batteries out to reposition the label (see 4th from the left), and gave up since I almost nicked the protective plastic.
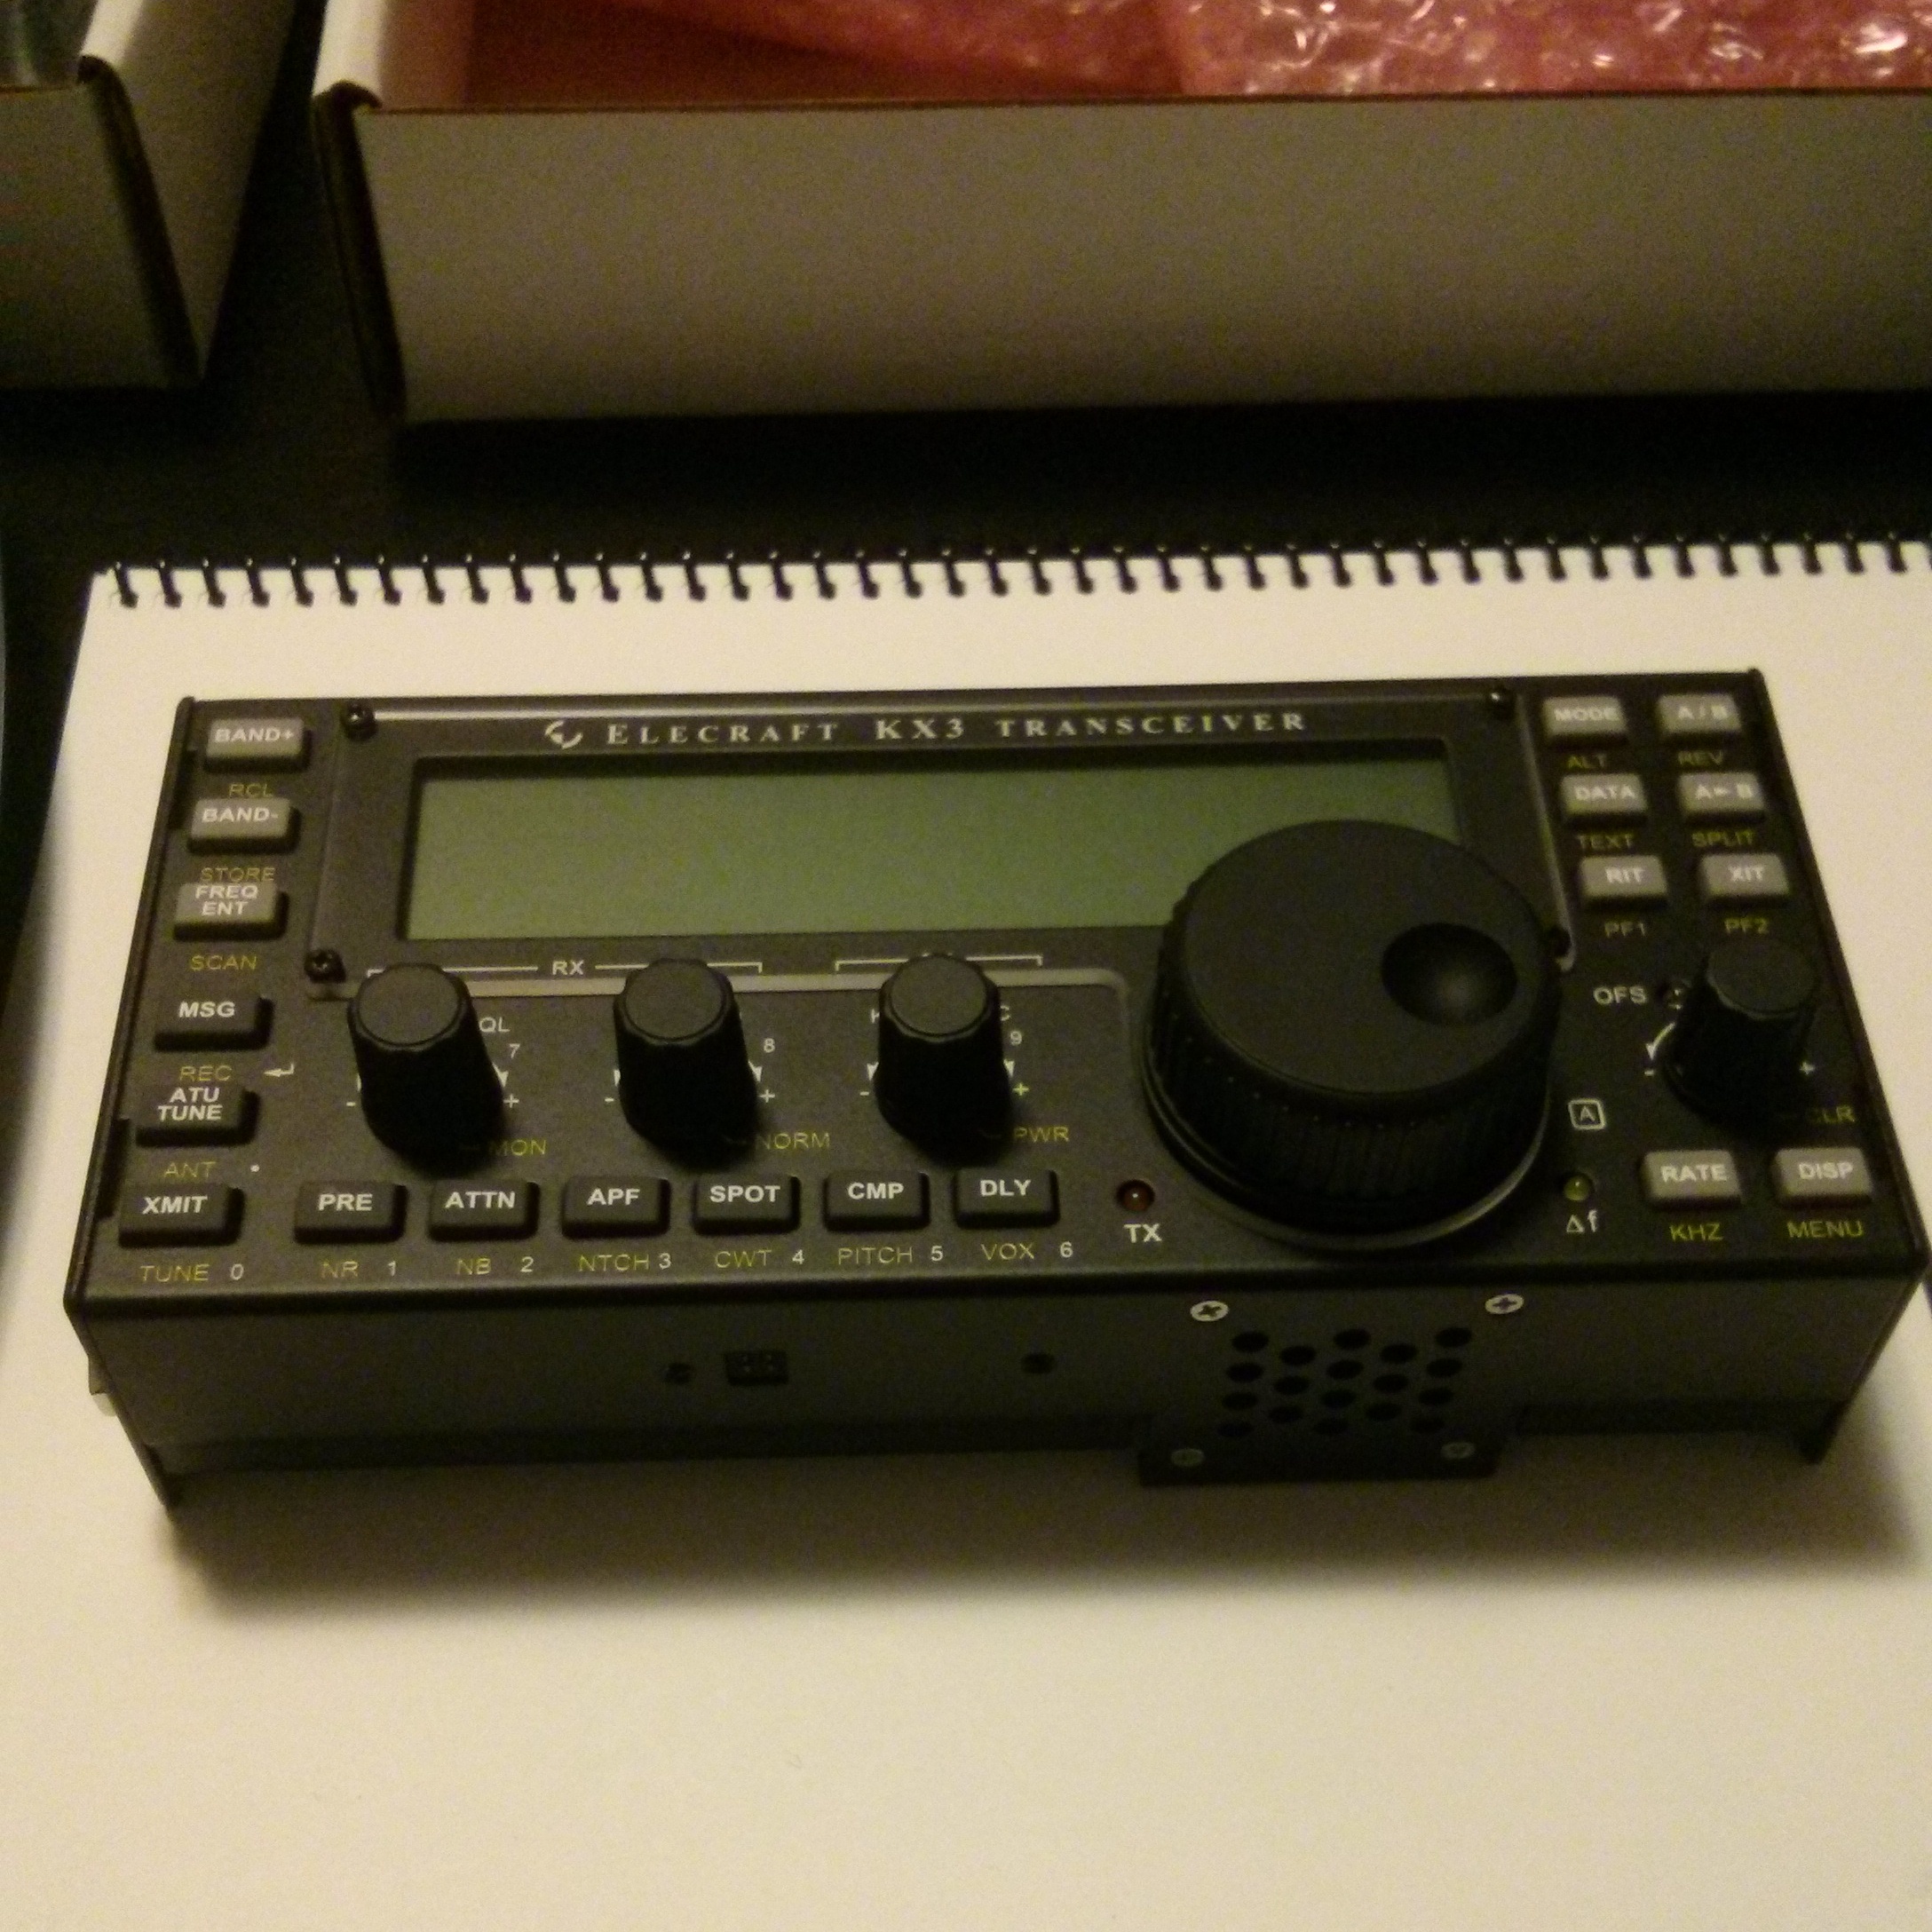
So, in summary: Â The Elecraft KX3 is an outstanding radio, with some minor faults. Â I am excited to have it in the shack, and expect it will be my go-to radio for many years to come. Â With the Elecraft team actively adding features (in the form of software updates) and accessories to the radio, like the newly released Elecraft PX3, we are still in the early days of this radio, with lots of pleasant surprises in the future.
Posted: Sep 25, 2014
Keyword tags: ham radioelecraftkx3reviewbuilding

